Fix: Error 0x80070666 when Installing Microsoft Visual C++
Several Windows users are encountering the “0x80070666” error when trying to install Microsoft Visual C++, Lumberyard or a similar distribution package. The error message is typically reported to occur at the very start of the installation process. This particular issue is not specific to a certain Windows version since it’s confirmed to occur on Windows 7, Windows 8.1 and Windows 10.

What is causing the 0x80070666 Error when Installing Microsoft Visual C++?
We investigated this particular issue by looking at various user reports and the repair strategies that most affected users have deployed in order to resolve this particular error message. From what we gathered, there are several different scenarios that will trigger this error message:
- Another Visual C++ installation is already present – As it turns out, Visual C++ 2015 and Visual C++ 2017 will contain some common binary files that are known to conflict. If you already have Visual C++ Redist 2017 and you’re trying to install the 2015 Redist, you’ll likely see this particular error message. In this case, uninstalling the newer Visual C++ should resolve the issue.
- Bad Visual C++ installation – There are certain scenarios that might end up contributing to a bad installation of the Visual C++ Redistributable package. Whenever this occurs, you have little other choices that running a specialized Fix-it tool or trying to force the Repair screen to pop up using Command Prompt.
- Windows Update is planning on installing the same Visual C++ package – Another scenario in which you might encounter this particular issue is if the updating component (Windows Update) has a pending update that will update the same Visual C++ package. In this case, installing every pending Windows update should resolve the issue automatically.
If you’re currently for a fix that will allow you to bypass the 0x80070666 error and complete the installation of the distribution package, this article will provide you with several troubleshooting methods. Down below, you have several potential fixes that other users in a similar situation have successfully used to get the issue resolved.
The methods are ordered by efficiency and severity, so please follow them in the order that they are presented. One of them is bound to resolve the issue in your particular scenario.
Method 1: Uninstalling all current Visual C++ Redistributable packages
As a lot of users have reported, this particular issue is mostly occurring if your computer already contains a version (older or newer) of the same distributable package that you’re trying to install.
In most cases, the error appears when the user tries to install Visual C++ Redist 2015 but a newer installation is already present on that system. Several affected users have reported being able to resolve the Setup failed – 0x80070666 installation error by uninstalling the newer version.
Here’s a quick guide on how to do this:
- Press Windows key + R to open up a Run dialog box. Then, type “appwiz.cpl” and press Enter to open up the Programs and Features screen.

Type appwiz.cpl and Press Enter to Open Installed Programs List - Inside the Programs and Features screen, scroll down through the list of installed programs and locate all your Microsoft Visual C++ Redist installations.
- Right-click on every Microsoft Visual C++ Redist installation and choose Uninstall. Then, follow the on-screen prompts to complete the uninstallation for every redist package.

Uninstalling every Visual C++ Redist package - Once every Visual C++ package has been uninstalled, restart your computer and wait for the next startup to complete.
- Attempt to install the same Redist package that was previously failing with the 0x80070666 error.
If you’re still encountering the same error message, move down to the next method below.
Method 2: Running the Fix-It tool
There is one Microsoft Fix It tool that several affected users have successfully used to resolve the problem that was preventing the redist package from being installed automatically. This particular Fix It tool will perform several repair strategies that will repair several components (including corrupted registry keys) used during the installation of new programs.
Note: This Fix it tool will work for Windows 7, Windows 8, Windows 8.1 and Windows 10.
Here’s a quick guide on using this Fix It tool to resolve the 0x80070666 error:
- Visit this link (here) and click the Download button to download the Fix It tool.
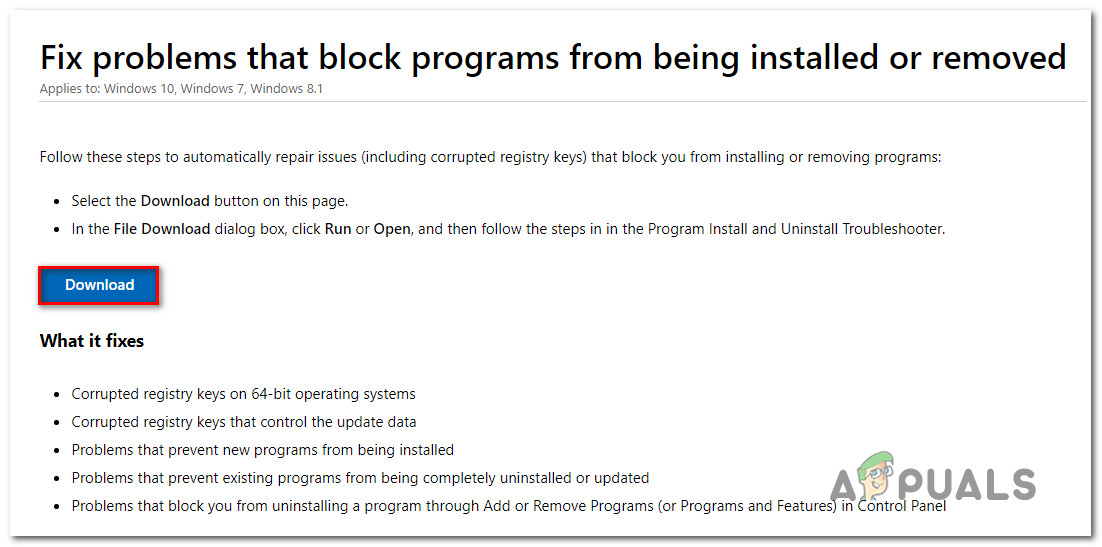
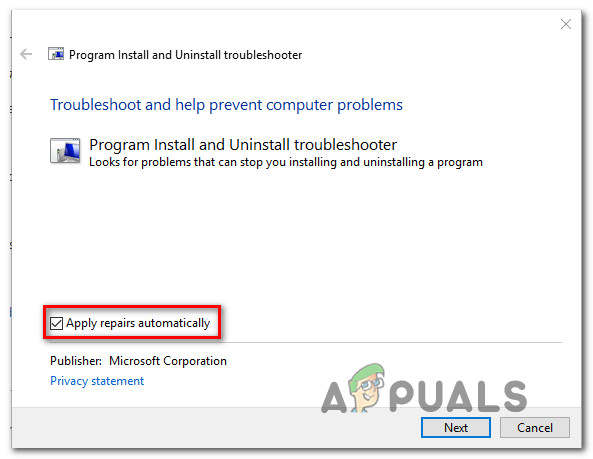
Downloading the Fix it Tool - Once the tool has been downloaded, double click on the .diagcab file to open up the Fix It tool. Once you see the initial screen, click on Advanced and make sure that the box associated with Apply repairs automatically is checked. Then, click Next to advance to the next menu.
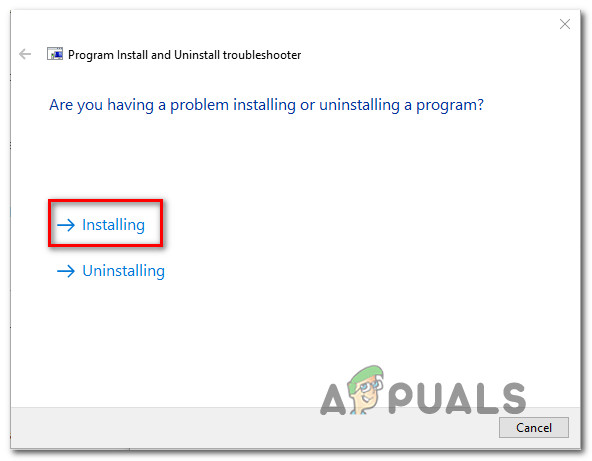
Applying repairs automatically - At the next screen, click on Installing.
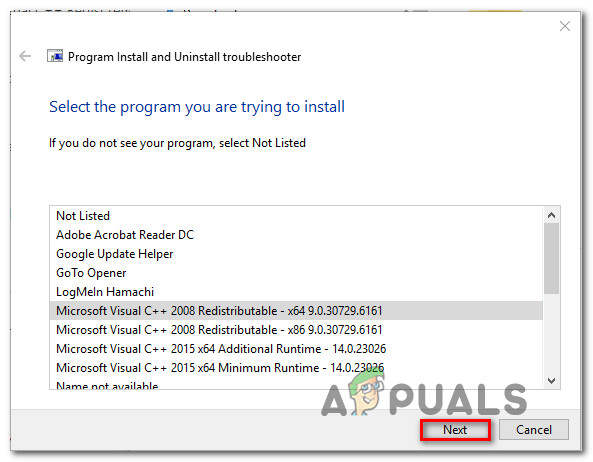
Problems with Installing programs - Wait until the inspection phase is complete, then select which redist package you’re encountering the issues with and click Next.
Selecting the redist package that you’re having issues with - Follow the recommended repair strategies until you reach the end of the program.

Trying out the recommended fixes - Once the Fix It tool has run its course, restart your computer and see if you’re able to install the redist package at the next startup without issues.
If you’re still encountering the 0x80070666 error, move down to the next method below.
Method 3: Installing any pending Windows Updates
As it turns out, you might be encountering the 0x80070666 error because Windows Update is already preparing to install the same redist package. Several affected users reported that upon making the necessary Windows update, the redist package that was previously failing with the 0x80070666 error was installed automatically.
Here’s a quick guide on installing any pending Windows update:
- Press Windows key + R to open up a Run dialog box. Then, type “ms-settings:windowsupdate” and press Enter to open up the Windows Update tab of the Settings app.
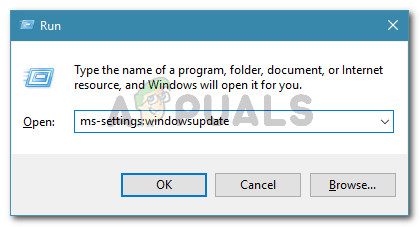
Run dialog: ms-settings:windowsupdate Note: If you’re not on Windows 10, use the “wuapp” command instead.
- Once you arrive at the Windows Update screen, click on Check for updates and follow the on-screen instructions to install all the pending windows updates.
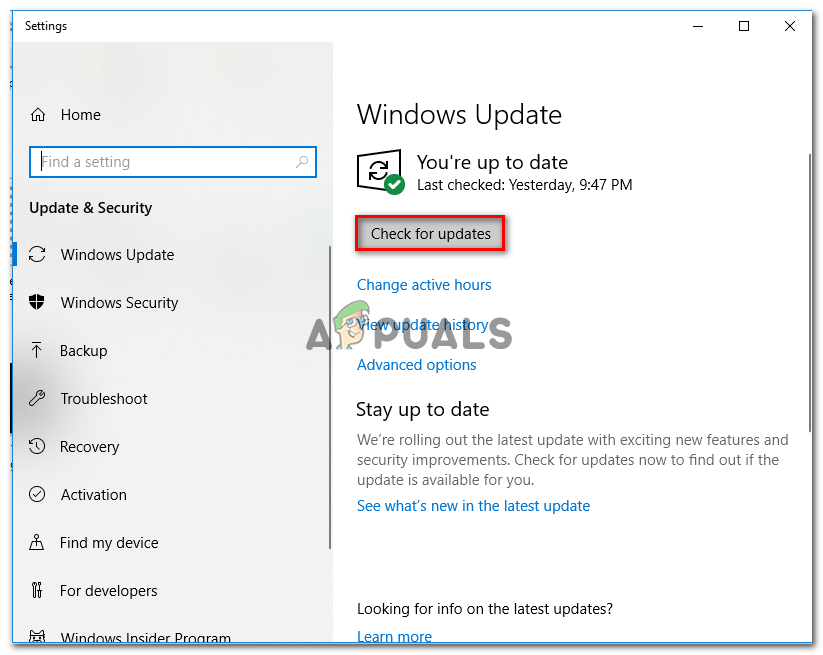
Installing every pending Windows update - Once every pending update has been installed, restart your computer and see if the redist package is not already installed. If it isn’t, try to install it and see if you’re still encountering the same error message.
If you’re still haven’t managed to get rid of the 0x80070666 error, move down to the next method below.
Method 4: Using Command Prompt to repair the Visual C++ installation
Several affected users have reported that they suspected that the Visual C++ installation was corrupted, but they had no means of repair it since the program didn’t appear inside the Add or Remove Programs list. This typically happens with the Visual C++ 2015 Redistributable package.
Fortunately, they were able to fix this by downloading the installation executable and forcing the repair window to appear via Command Prompt. Here’s a quick guide on how to do this:
- Make sure that the installer of the redistributable package that you’re trying to install is present on your computer. Make sure that know it’s exact location. If the installer is not present on your PC, download it again.
- Press Windows key + R to open up a Run dialog box. Then, type “cmd” and press Enter to open up Command Prompt.
- Inside the Command Prompt, use the following command to change the directory to the one holding the file. For example, if the redist installer (e.g. vc_redist.x64.exe) is located inside the Download folder, then you’ll need to use the following command to change to the relevant directory:
CD C:\Users\*YourUser*\Downloads
- Once you’ve made sure that the terminal is working in the right directory, type the name of the installation executable followed by /uninstall to force the install window to appear. Like this:
vc_redist.x64.exe /uninstall
- Then, click Repair and follow the on-screen prompts to repair your Visual C++ redist installation.