Voice Chat Not Working FiveM (Fix)
The failure of the FiveM Voice Chat feature to operate can stem from various causes like disabled Voice Chat, incorrect Microphone settings in the game, or even setting the Voice Chat Proximity to improper values, subsequently reducing audio functionality and rendering voice chat inaudible.
Let’s delve into the potential factors causing this issue and explore various troubleshooting methods.
- Incorrect audio devices: Selecting the wrong input or output device can hinder the Voice Chat feature in GTA V. Issues can arise if, for example, you’re using a wired microphone but a wireless one is selected in your game or Windows settings.
- Outdated drivers: Outdated audio or sound drivers can also prevent FiveM Voice Chat from functioning properly due to compatibility problems.
- Damaged files: Corrupted or damaged FiveM files may lead to malfunctions in the Voice Chat feature.
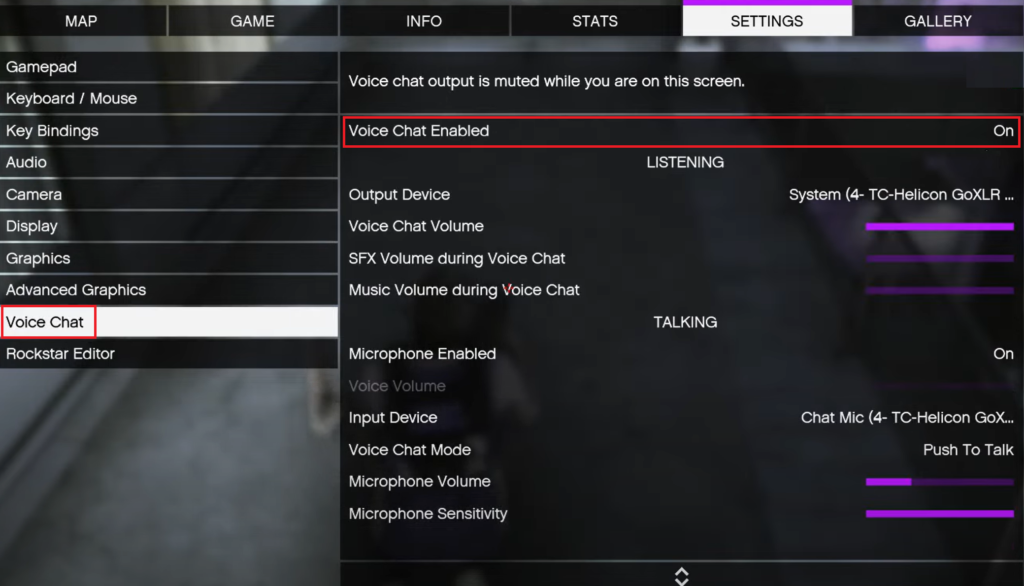
1. Ensure Voice Chat Is Enabled
To troubleshoot any issue, first verify that it is not a result of settings on your side. Confirm that Voice Chat is activated, particularly if you or your fellow players cannot hear each other.
Here’s how to enable Voice Chat:
- Open GTA V.
- Access the Escape menu.
- Click on the Settings tab.
- Select Voice Chat on the left panel.
- Ensure the Voice Chat Enabled setting is toggled On.
- Apply changes and exit the menu.
2. Ensure Microphone Is Enabled
Should you be able to hear others but not transmit your own audio, it’s likely that your microphone is disabled. Check the mute button on your headset to make sure it isn’t engaged. Next, confirm the microphone’s access and activation in the game settings.
To enable your microphone, follow these steps:
- Open the Escape menu in the game.
- Go to Settings.
- Select Voice Chat from the left panel.
- Check that the Microphone Enabled option is On.

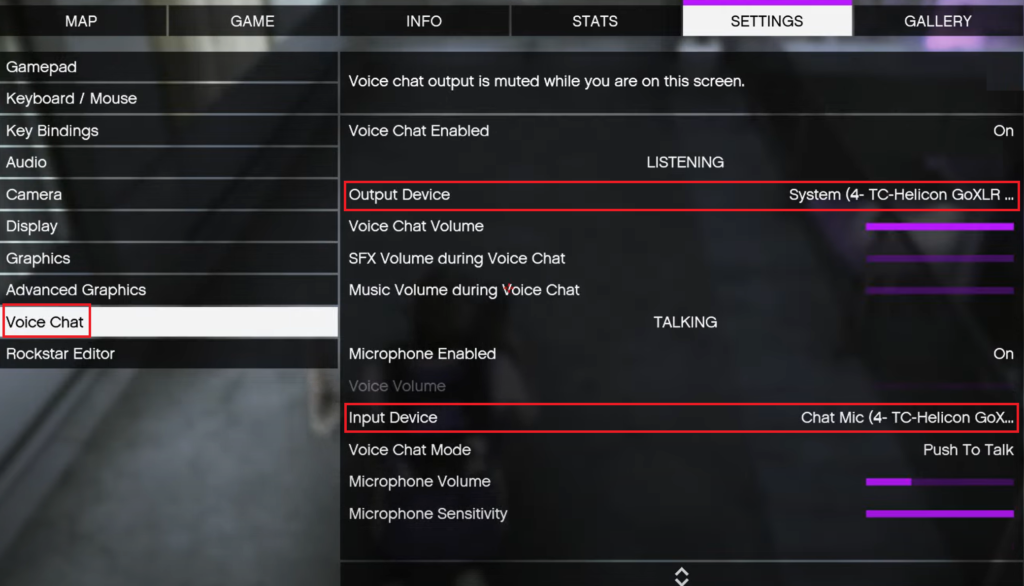
3. Select the Correct Input and Output Devices in In-Game Settings
If several sound input and output devices are connected to your computer, check your in-game settings to ensure that the correct devices are set as defaults. For example, select your headset and its microphone for audio output and input if you prefer them over the computer’s built-in speakers and microphone.
To adjust device settings in-game, follow these instructions:
- Open FiveM.
- Navigate to Settings.
- Click on the Voice Chat tab from the left panel.
- Under Talking, select your Input Device.
- Similarly, under Listening, ensure the correct Output Device.
4. Change Voice Chat Channel to Channel 2
The Voice Chat channel is typically set to 1 by default. Switching to channel 2 has resolved issues for many users, similar to changing servers when streaming online content.
To alter the Voice Chat channel:
- Launch FiveM.
- Access the main menu.
- Select Voice Chat Settings.
- Find the Voice Chat Channel option.
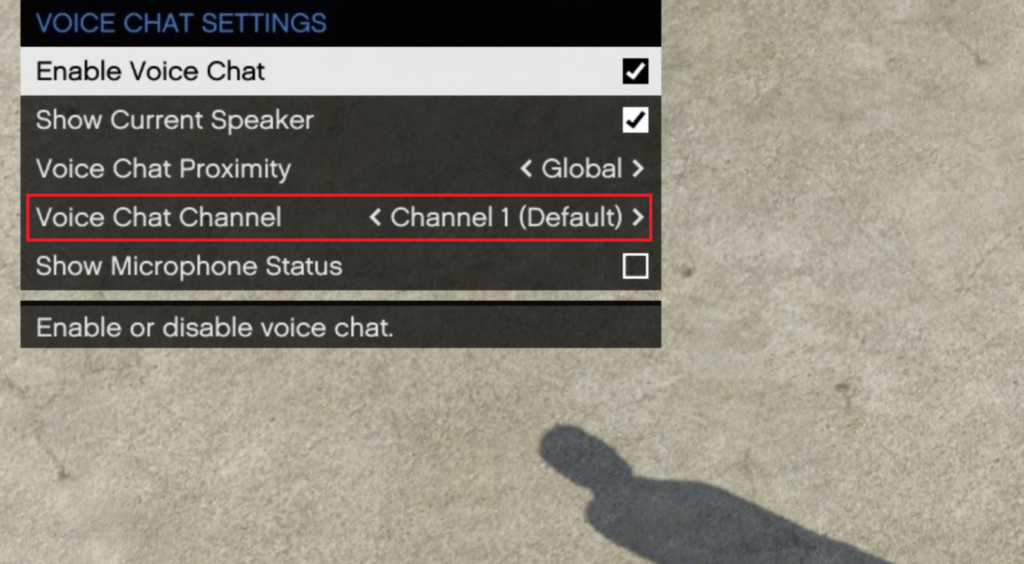
- Change it to Channel 2.
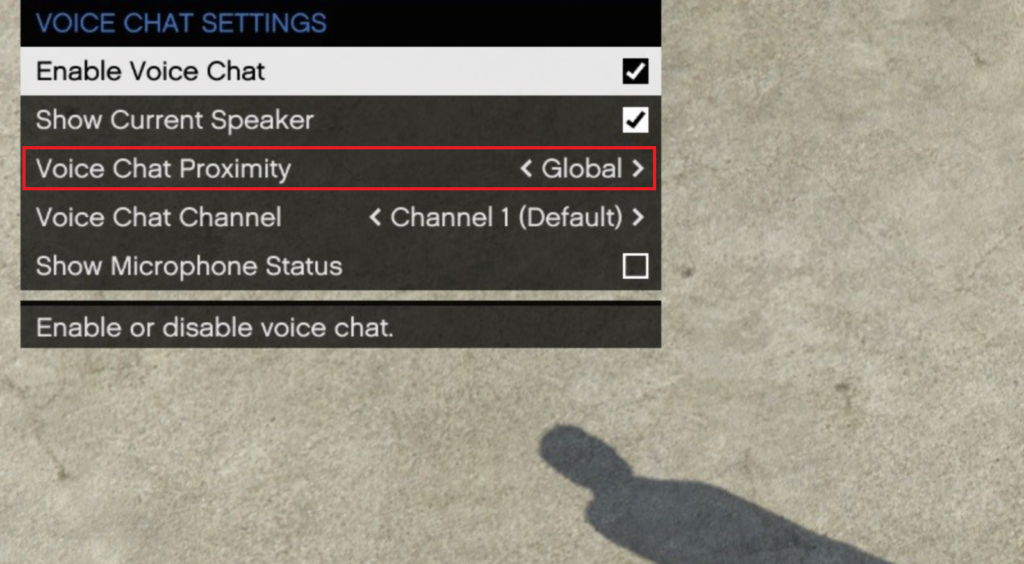
5. Set Voice Chat Proximity to 15M
In case of difficulty in communicating with nearby players, consider adjusting the proximity settings. Increasing the range to 15 meters allows players who are farther away to hear you.
To set the Voice Chat proximity:
- Open the main menu in FiveM.
- Click on Voice Chat Settings.
- Adjust the Voice Proximity setting.
- Set the proximity to 15M.
6. Select the Correct Input and Output Devices in Windows Settings
Conflicts between the in-game audio devices and those set in Windows can result in the voice chat not functioning properly. Ensuring that the devices match in both settings is recommended.
To synchronize audio devices in Windows:
- On the taskbar, access the Start menu.
- Open the Settings app.
- In the app, select Bluetooth & devices.
- Navigate to Devices.
- Scroll to Sound under Related settings.
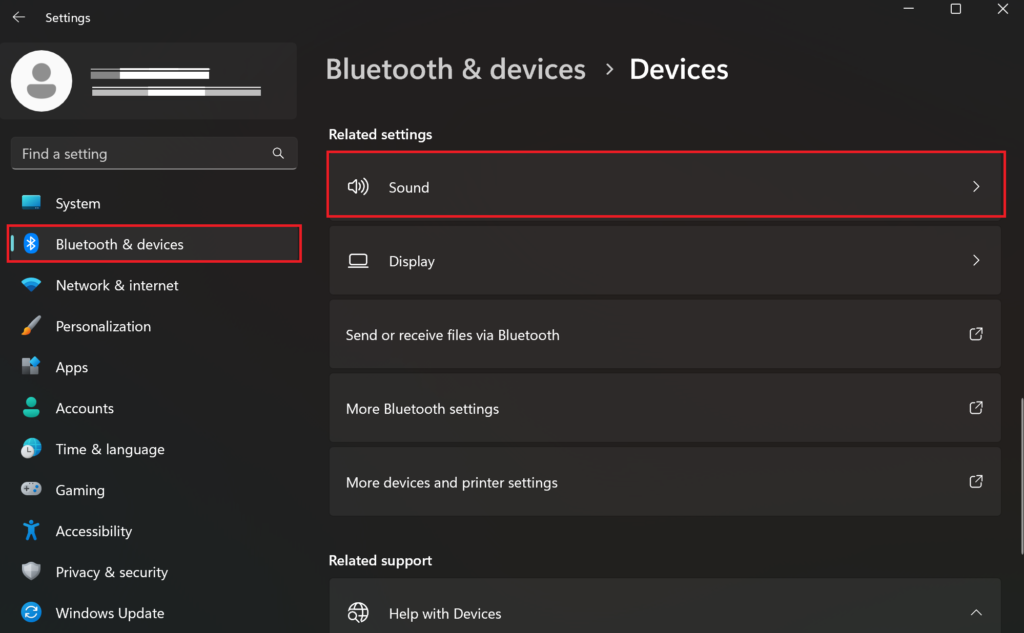
- Select the correct Input and Output devices.
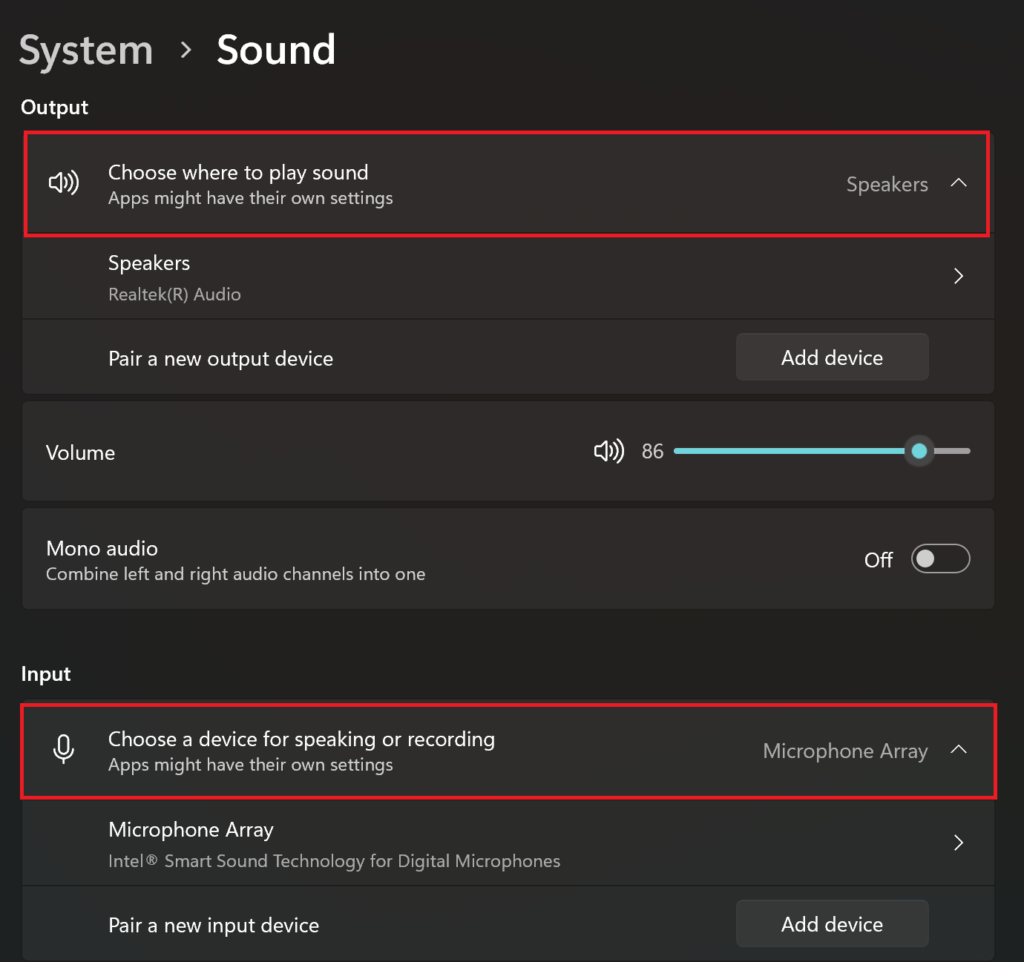
7. Change Your Input and Output Devices to Default
Changing your input/output audio devices to the default within the essential sound settings of your computer might solve the problem if it persists.
To set the default devices:
- Open the Settings app from the Start menu.
- Select Bluetooth & devices.
- Proceed to Devices.
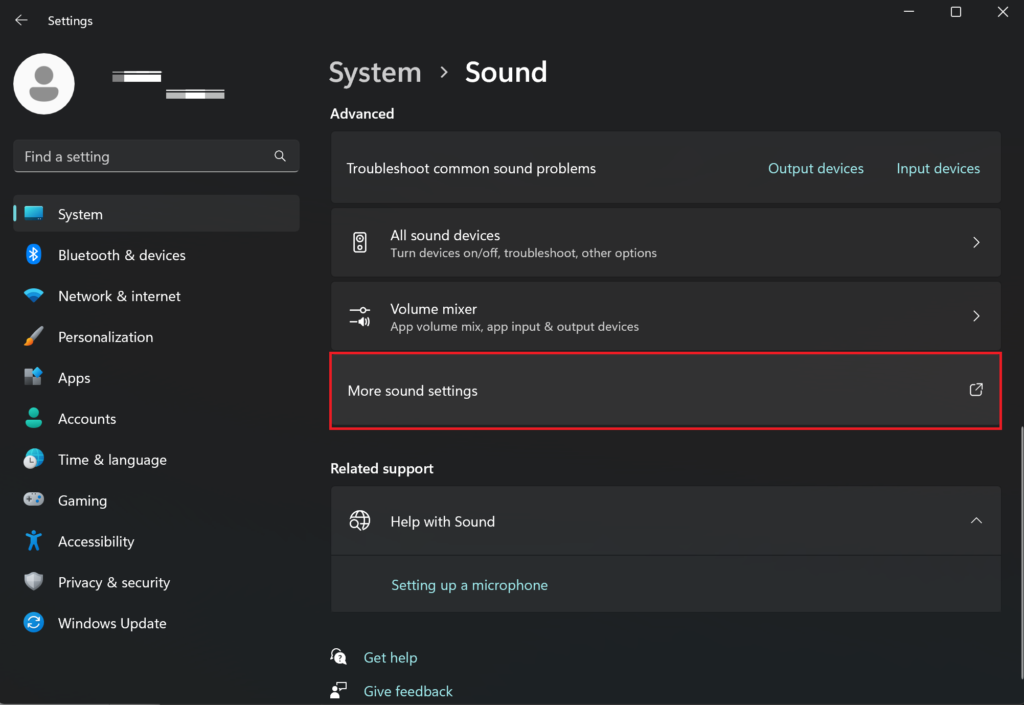
- Click on Sound.
- In the Advanced section, choose More sound settings.
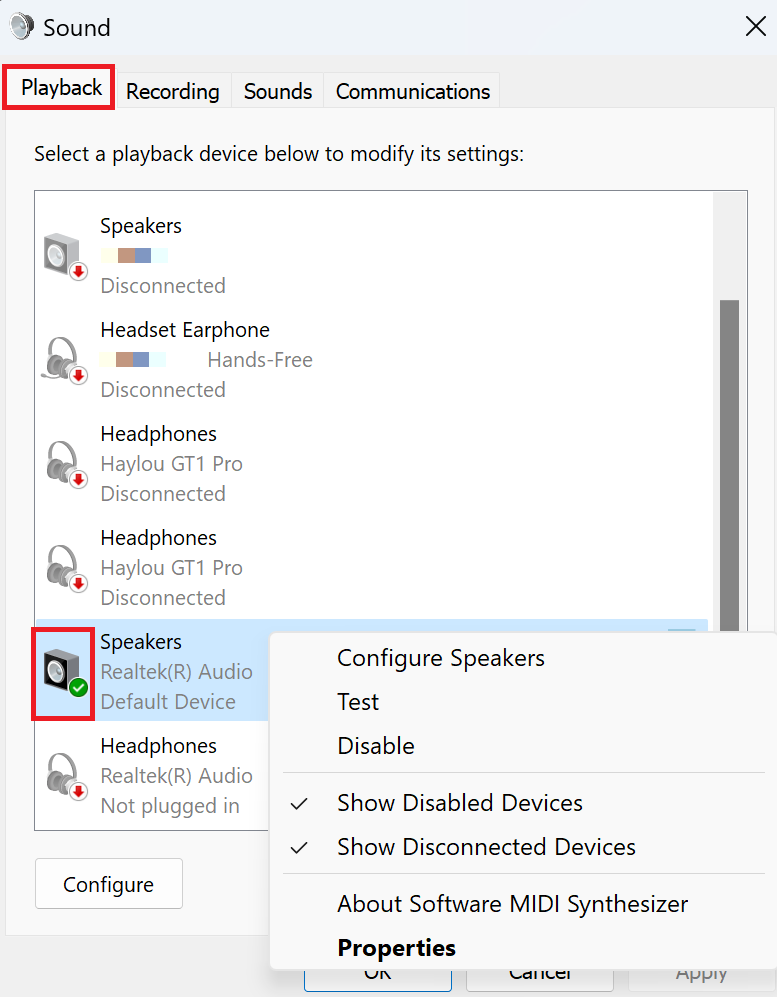
- In the Playback tab, right-click the device you want to set as default. If it is already set as the default, it will have a green checkmark and no such option will be visible on right-click.
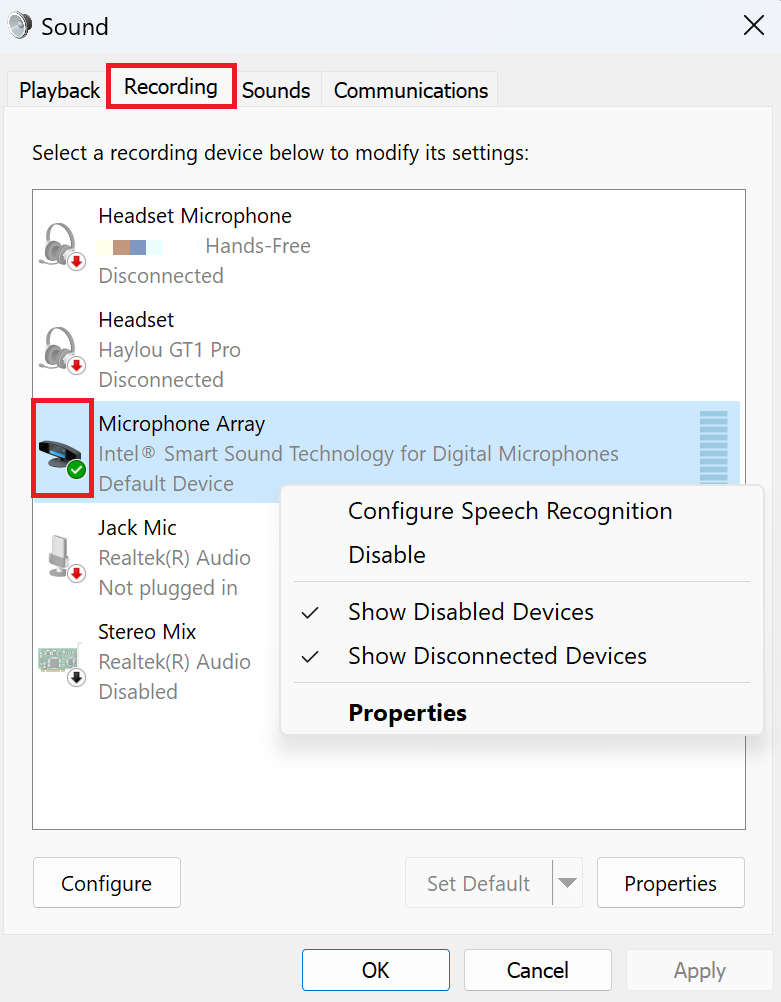
- Move to the Recording tab, and ensure to set your microphone as both the default device and the default communication device.
- To confirm the changes, click Apply and then OK. Restart the game to see if the issue is resolved.
For some individuals, resolving the issue also entailed disabling Exclusive mode as outlined below:
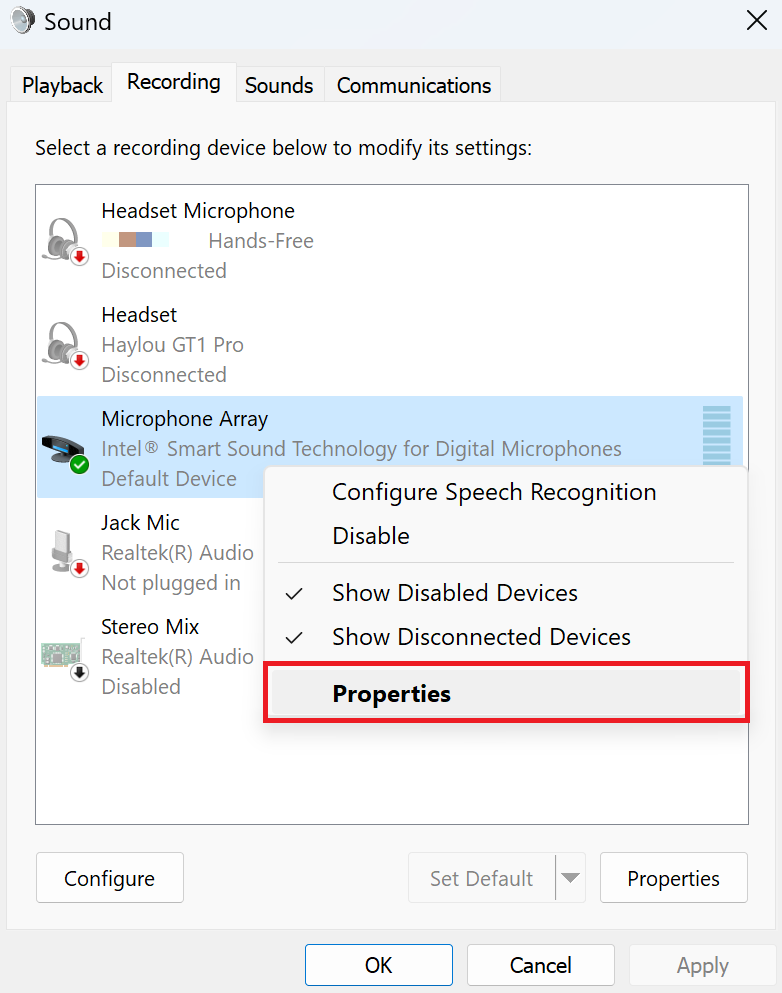
- In the Recording tab, right-click the designated microphone and select Properties.
- Go to Advanced.
- Uncheck the options for Allow applications to take exclusive control of this device and Give exclusive mode applications priority.
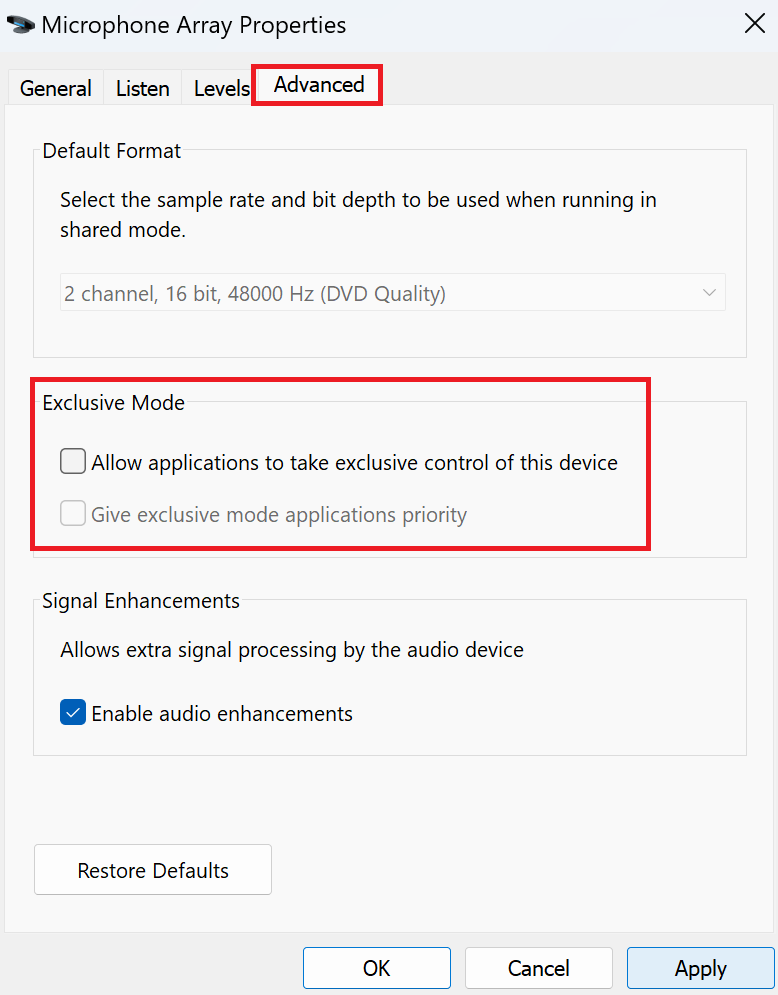
- Press Apply, followed by OK. Reboot your game to check if the problem has been rectified.
8. Update Audio Drivers
Out-of-date or malfunctioning audio drivers might prevent voice chat in FiveM. Ensure that your drivers are current. If they are not, update them:
- Press the Windows and X keys to open the Quick Link Menu.
- Select Device Manager.
- Expand the Sound, video, and game controllers section.
- Right-click on your audio device.
- Choose Update Driver.
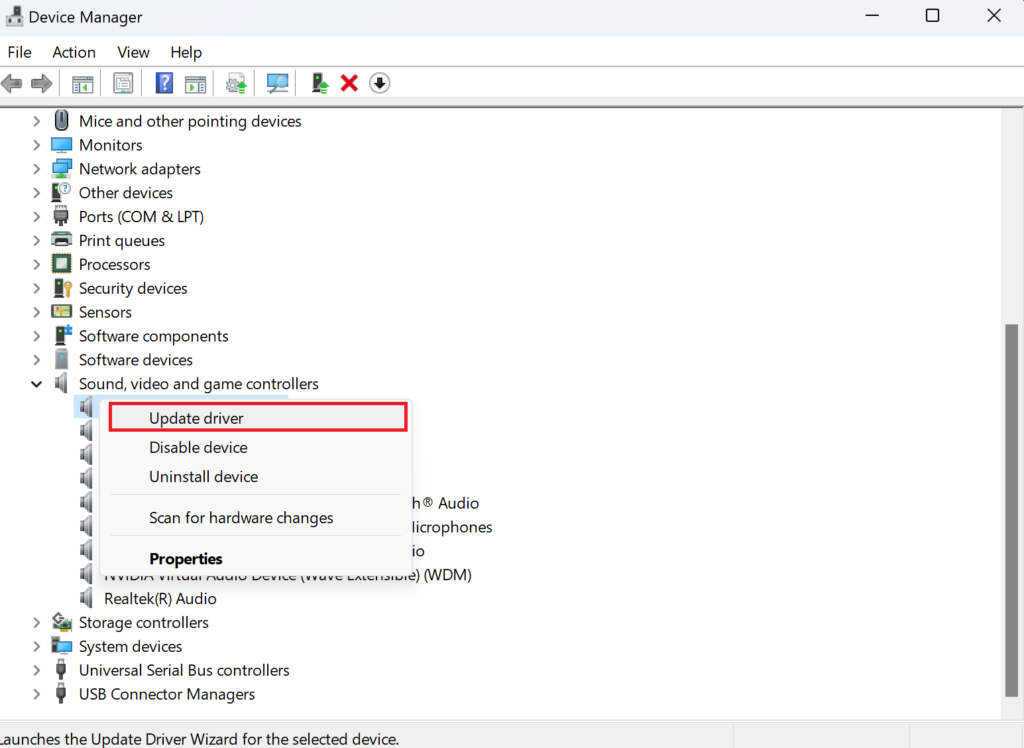
- Opt for Search automatically for drivers, allowing the system to find and install available updates.
- Repeat for the Audio Inputs & Outputs section.
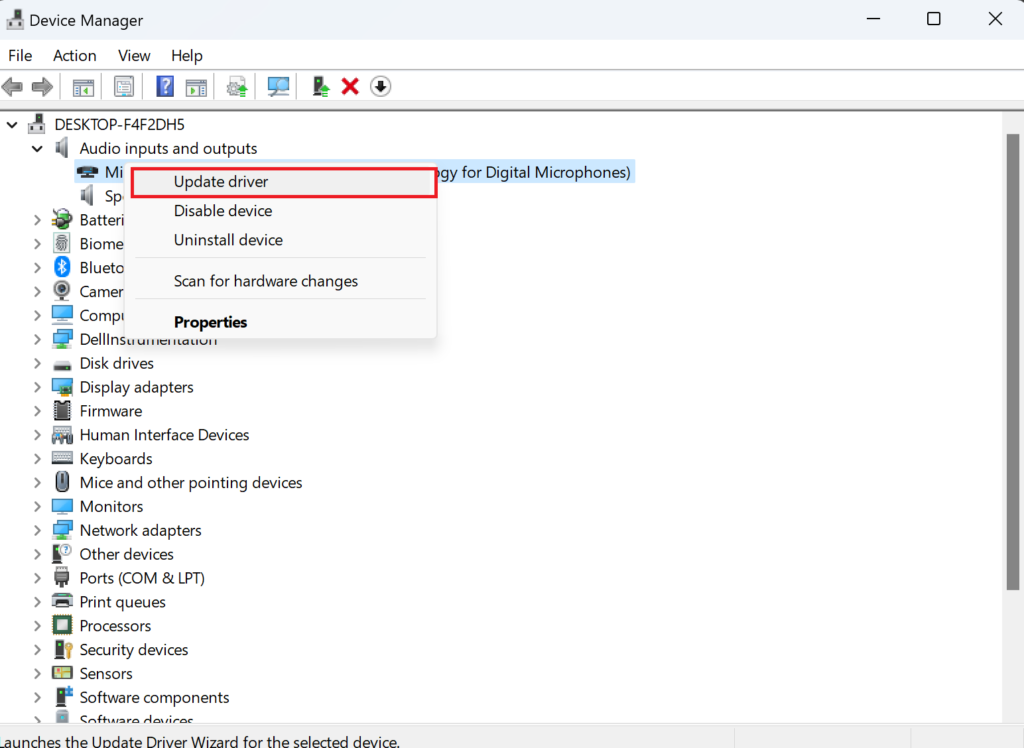
- Restart your computer once the updates are completed.
9. Verify the Game File
Corrupted or missing game files necessary for smooth operation could disrupt voice chat. To address file-related issues:
Note: This process will repair the GTA V game files, not issues directly associated with FiveM.
To verify game files:
- Open Steam
- Head over to the Library and find GTA V, then right-click on it.
- Click on Properties from the context menu.
- In the new window, navigate to the Local Files tab on the left.
- Select Verify integrity of game files… to let Steam check and repair any problematic files automatically.
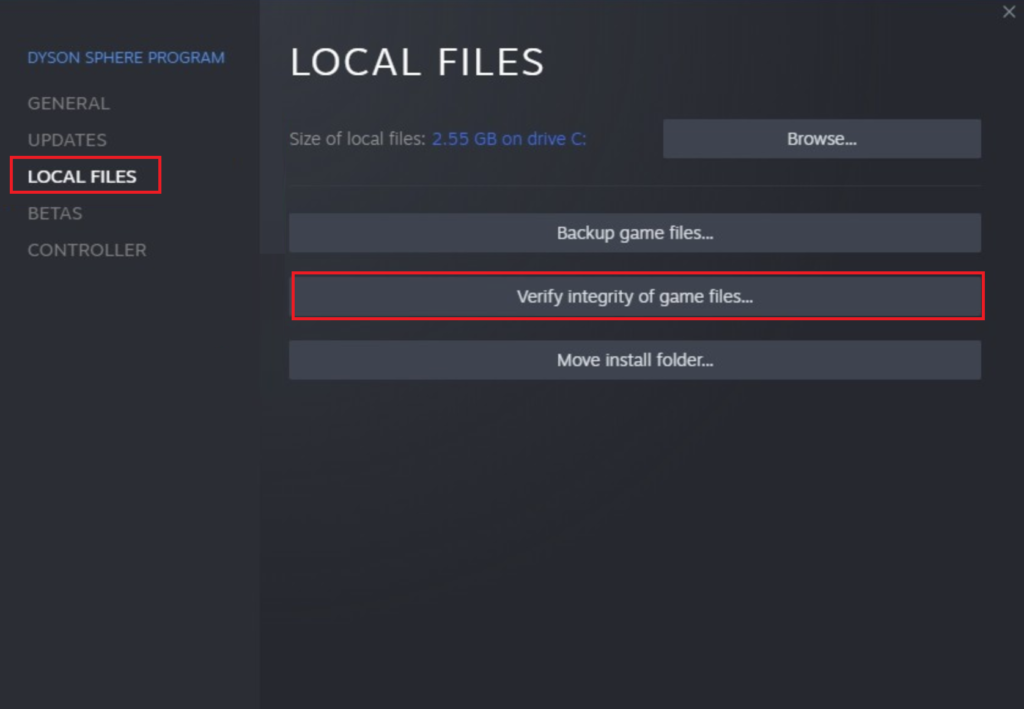
- After the verification is complete, reboot your PC and start GTA V via Steam to check if the issue is resolved.
10. Clear FiveM Cache
An overloaded cache in FiveM could be plagued by a bug or get corrupted, potentially causing the Voice Chat to malfunction. Clearing the app’s cache is a safe process and does not impact your game settings or personal data.
To clear the cache in FiveM:
- Press the Start menu button on your taskbar.
- Search for FiveM and right-click the application result.
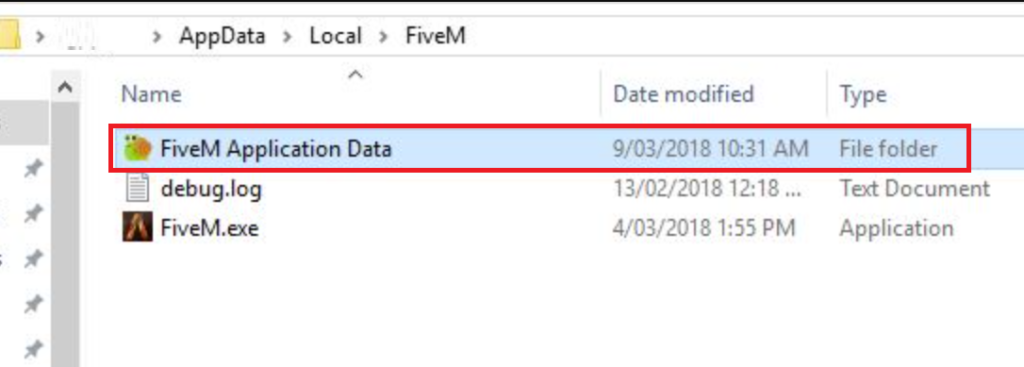
- Select Open file location.
- Find the FiveM folder and right-click on it to choose Open file location again.
- In the opened folder, double-click on FiveM Application Data.
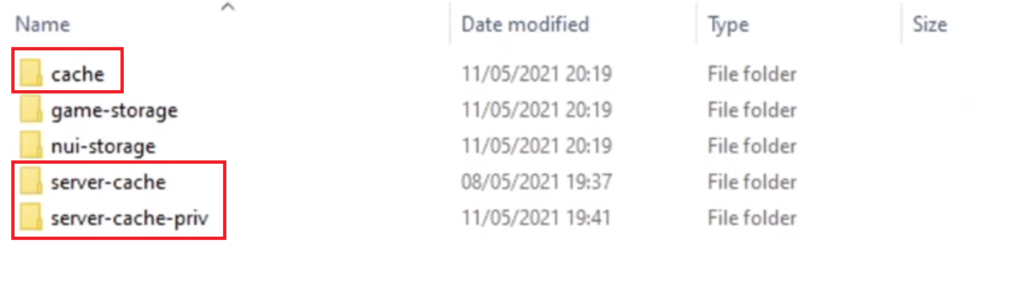
- Navigate to the data folder.
- Select the cache, server-cache, and server-cache-priv folders while holding the Ctrl key, then press the Delete key on your keyboard and confirm the action.
- Restart your computer and launch FiveM to test the Voice Chat.
11. Reinstall FiveM
If none of the above methods resolve the FiveM Voice Chat issue, consider uninstalling the app and performing a fresh install. This eliminates potentially problematic files and data, allowing you to start anew with a clean installation.
Here’s how to uninstall and reinstall FiveM:
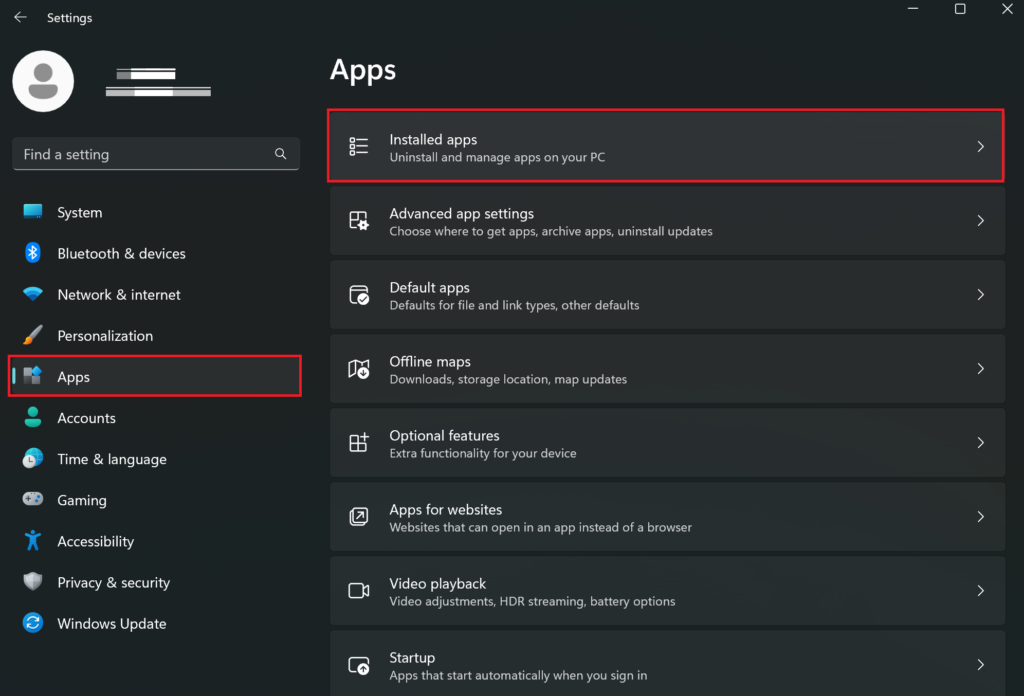
- Hit the Windows + I keys to open Settings.
- Navigate to Apps from the sidebar.
- Click Installed apps.
- Find FiveM, click on it, and then select the Uninstall option from the three dots icon.
- Follow the prompts to uninstall FiveM completely.
- Next, visit the official FiveM website and download the installation file.
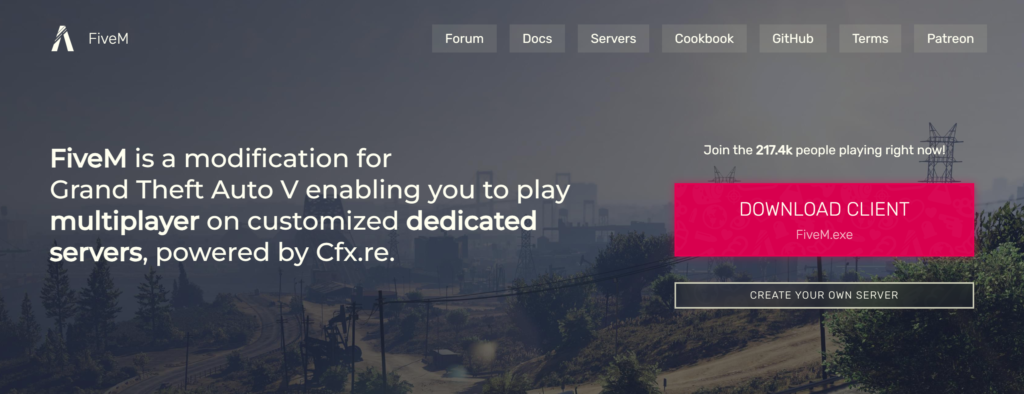
- Run the downloaded setup file to reinstall FiveM and then check if the voice chat is functioning correctly.
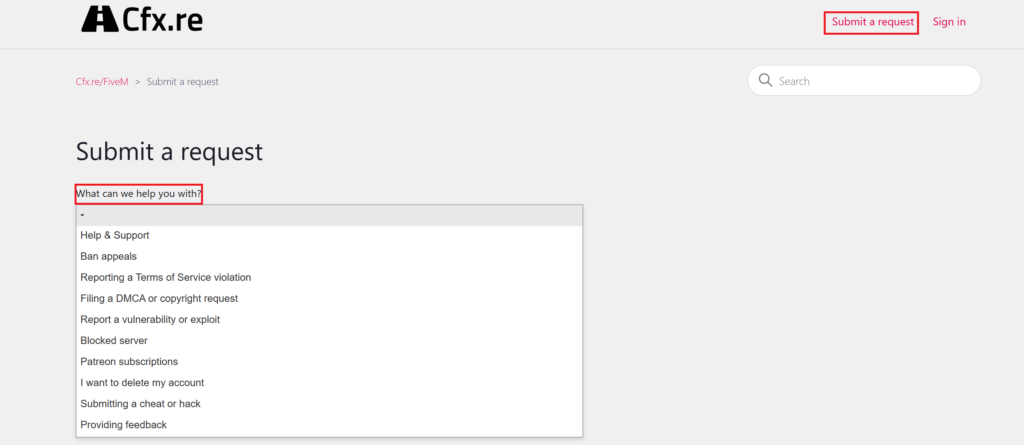
12. Contact FiveM Support
Additionally, FiveM has a support page where you can submit reports about game, server, account issues, and more. Simply click ‘Submit a request’, choose the relevant category, and fill in the form. The support team will get in touch with a proposed solution.