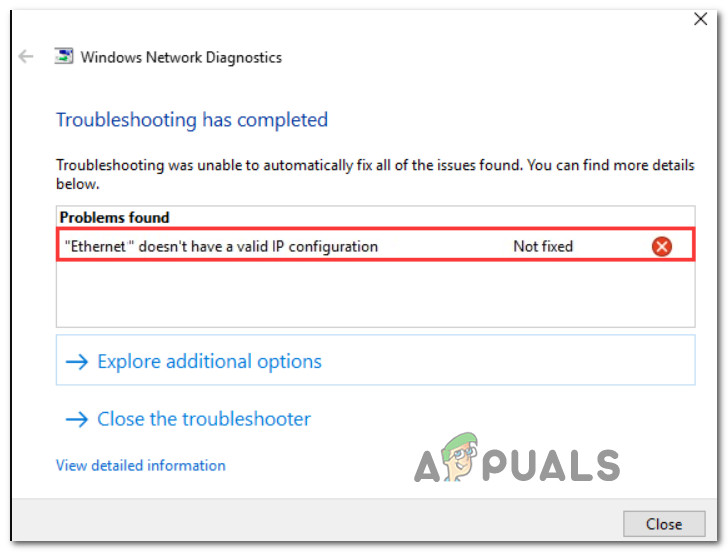
How to Fix Ethernet doesn’t have a valid IP configuration on Windows?
The Ethernet Doesn’t Have a Valid IP Configuration error is a common issue in Windows operating systems. It often appears when users run a Windows Network Diagnostics scan. The problem usually relates to a fault with the NIC (Network Interface Card). Affected users have reported this issue on both Windows 10 and Windows 11.
We have investigated this issue by analyzing various user reports and their solutions to fix the problem. It appears there are several potential reasons that may cause the Ethernet Doesn’t Have a Valid IP Configuration error.
Common Reasons for this Error
Below is a list of scenarios that could be causing this issue:
- Fast startup-related inconsistency – An issue with the fast startup feature, particularly on low-end PCs running Windows 10 or Windows 11, could lead to this error. Disabling fast startup via the Power Options menu has resolved the issue for many users.
- Manual DNS Range is inconsistent – Adjusting the DNS range manually or through third-party software might lead to network retrieval issues. The solution often involves reconfiguring Windows to automatically fetch the DNS data.
- Router Cache inconsistency – Cached data on your router might cause the error. Resolving this requires restarting or resetting your router. It may also be helpful to optimize your network usage.
- Incompatible network adapter driver – Upgrading to Windows 11 may produce this error due to an incompatible network adapter driver carried over from the older version. Uninstalling the current network adapter or resetting network settings may help.
- System file corruption – System file corruption that affects network-related data retrieval may be the reason. Third-party applications such as Restore can be utilized to identify and fix these issues.
- IP-related inconsistency – Prolonged idle periods could mean your ISP has changed your dynamic IP, which might cause the error. Restarting your PC should give you a new IP address. Additionally, using certain commands in an elevated CMD prompt can refresh your IP configuration.
- Inconsistent DNS range – An unstable DNS range may lead to the error. Switching to a stable DNS range, such as Google DNS, may resolve the issue.
- Ethernet cable is not congruent – Make sure all network-related cables are properly connected and compatible to prevent data exchange issues.
- IPv6 inconsistency – Problems can occur when legacy games or applications that are incompatible with IPv6 are used. Disabling IPv6 to force IPv4 usage can prevent this message from occurring.
- Microsoft Kernel Debug Network Adapter is enabled – If you have a custom network adapter, it might conflict with the Microsoft Kernel Debug Network Adapter. Disabling it could resolve issues.
- The network card doesnt have a MAC address – Network cards may require a custom MAC address to prevent errors. This involves manually assigning a MAC address.
- DHCP is disabled – Your PC needs DHCP enabled to assign proper network configuration settings. Enabling it via the Services screen is necessary.
- Custom Power Management Customizations are enabled – Power-saving features in Windows 11 and Windows 10 might conflict with network protocols. Disabling these features, particularly on laptops, while performing resource-intensive tasks can help.
- 3rd party AV interference – Antivirus software can interfere with network data retrieval. Disabling the AV temporarily may stop the error from occurring.
- Disk-related issue – Corrupt system files and dependencies used in network data retrieval could cause the error. Running a CHKDSK scan can detect and fix these issues.
- Interfering Virtual Ethernet Devices – Virtual Ethernet Devices from VirtualBox or VMWare could conflict with network dependencies. Disabling these devices can address the issue.
- Network adapter is disallowed in BIOS – On legacy BIOS systems, the network adapter might be disabled. Enabling it through BIOS settings is crucial for connection.
- Outdated network drivers – Regularly updating your network drivers is recommended, and can be done using third-party software.
- Bad Windows Driver – A recently installed Windows update might cause internet connection issues. Uninstalling the latest update can resolve this.
- QoS is disabled – Disabling Quality of Service (QoS) might cause the error. Enabling QoS can prioritize devices needing more bandwidth.
- The AutoConfig service is disabled – This necessary service may be disabled by third-party apps to free up resources. Forcing re-enablement from an elevated Command Prompt is required.
Having discussed potential causes, we can now move on to confirmed methods other users have successfully employed to identify and resolve the cause of the issue.
Now, lets proceed with the detailed troubleshooting methods:
1. Start with the obvious
Before going through the more in-depth fixes mentioned in this article, begin with a series of straightforward troubleshooting steps that frequently resolve the error.
To make things easier, weve compiled a step-by-step video tutorial to guide you through the most common fixes for this error:
- Check for Fast Startup interference.
- Make sure network settings are not using a manual DNS range.
- Address any network inconsistencies linked to cached data.
- Verify compatibility of your OS with the network adapter driver.
If the error persists after following the video tutorial, move onto the next suggested fix.
2. Migrate to Google or Cloudflare DNS
Switching your DNS to a service like Google or Cloudflare can be a clever move to fix network issues. Basically, these services often offer more reliable and faster DNS resolution than what you might get from your ISP by default. This means your computer may be able to communicate with internet servers more efficiently, potentially fixing configuration errors coming from DNS problems.
In simpler terms, its like having a faster and more reliable directory assistance when your computer is trying to find the address of the websites and services it needs to connect to.
- Open Windows Settings by pressing Windows Key + I.
- In Settings, select Network & Internet.
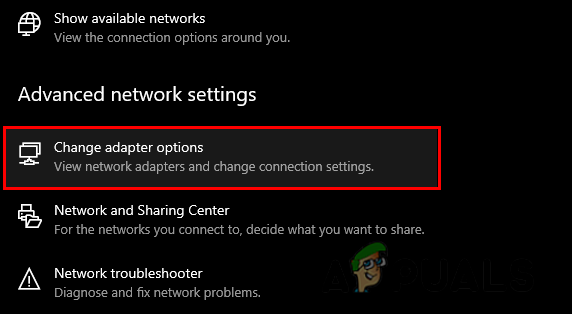
- Scroll down to Advanced network settings and click on Change adapter options.
Change adapter options Note: This will display a list of all network adapters on your PC.
- Right-click your active network adapter and choose Properties.
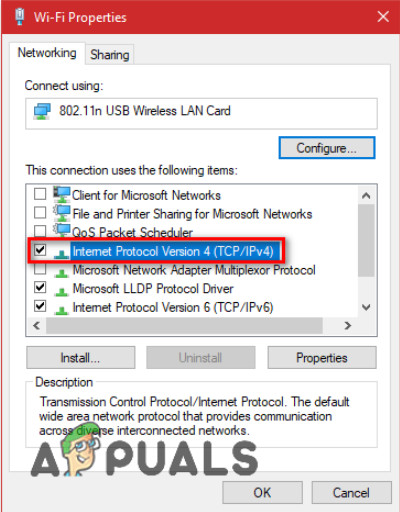
- In the Properties menu, go to the Networking tab.
- Select Internet Protocol Version 4 (TCP/IPv4) and click Properties.
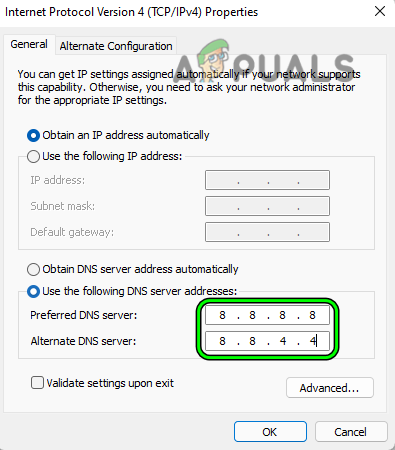
Modifying Internet Protocol settings - Switch to Use the following DNS server addresses and enter Google DNS or Cloudflare DNS addresses.
Configuring Google DNS - Save your changes and close the network adapter Properties screen.
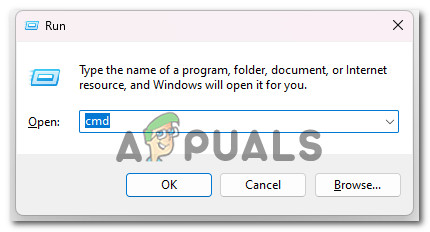
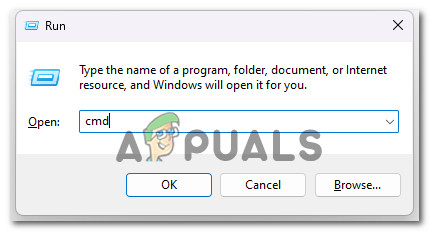
- Use the Windows key + R to open the Run dialog box, type cmd, and press Ctrl + Shift + Enter to launch an elevated Command Prompt.
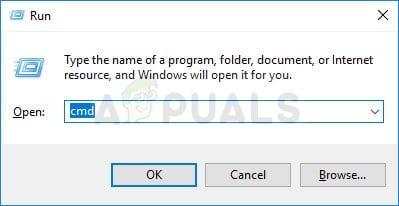
Access CMD settings - At the UAC prompt, click Yes to grant admin access.
- In the Command Prompt, type the following to clear any cached DNS data:
ipconfig /flushdns
- Try running diagnostics again to check if the issue is resolved.
3. Reset Your Network Settings
Performing a network reset is similar to giving your internet configuration a fresh start. This action clears any misconfigurations that might be causing communication issues between your computer and router. By wiping the existing network settings and restoring them to their original state, your system can re-establish connections properly, potentially clearing up this persistent error.
This process renews IP addresses and flushes DNS caches, which can remove any temporary glitches in connectivity.
- Press Windows key + R to initiate a Run dialog box.
- Type cmd in the dialog box, then press Ctrl + Shift + Enter to open an elevated Command Prompt window.

Open CMD as administrator - After the User Account Control prompt, click Yes to grant admin permissions.
- In the elevated Command Prompt, execute the following series of commands to reset your network component:
ipconfig /flushdns
ipconfig /renew
nbtstat –R
nbtstat –RR
netsh int ip reset c:\resetlog.txt
netsh winsock reset
- Restart your computer to complete the reset.
- Upon booting, press Windows + R, type control panel, and hit Enter.
- Select Network and sharing center and click on Change adapter settings on the left.
- Right-click your Ethernet hardware and choose Disable.
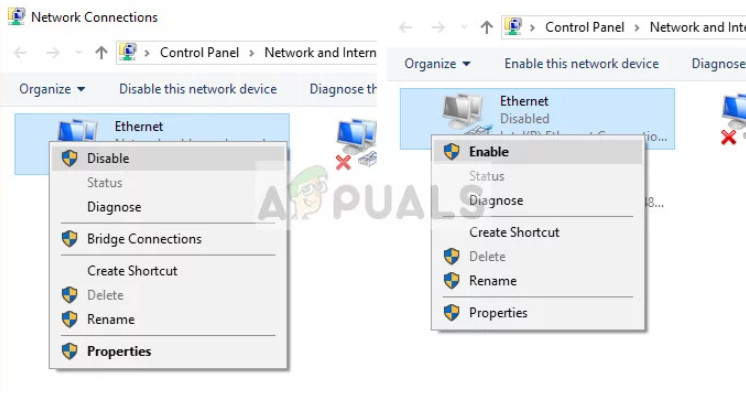
Re-enabling the Ethernet adapter - Wait a few moments before right-clicking again and choosing Enable.
4. Verify All Connected Cables
After trying the previous steps, ensure that all Ethernet cables are properly connected. While this may seem basic, incorrect cable connections can cause network issues.
Listen for the click sound when connecting cables to make sure theyre secure. If necessary, also check connection points between your home and your internet service provider.
If other devices also cant connect, there might be a more widespread issue. Fix any cable issues before moving on to the following method.
5. Disable IPV6
As a newer internet protocol, IPv6 isnt universally supported and may not go well with certain older applications or infrastructure that still rely on the IPv4 standard. By toggling off IPv6, we steer the network communication to use IPv4 exclusively, which can enhance compatibility and potentially eliminate the error.
This shift to a more universally accepted protocol could be just the fix your system needs to communicate effectively with your network hardware and the broader internet.
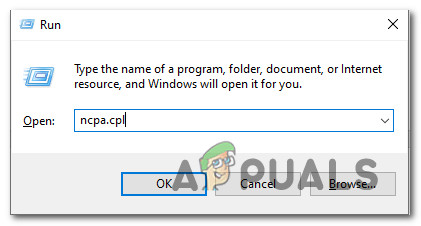
- To disable IPv6, press Windows key + R to open a Run dialog box.
- Type ncpa.cpl and press Enter to access the Network Connections menu.
Access Networking Connections menu - Right-click on your network adapter and select Properties.

Properties of an active network Note: Click Yes if prompted by the User Account Control (UAC).
- In the Properties window, under Networking, uncheck the box next to Internet Protocol Version 6 (TCP/IPv6).
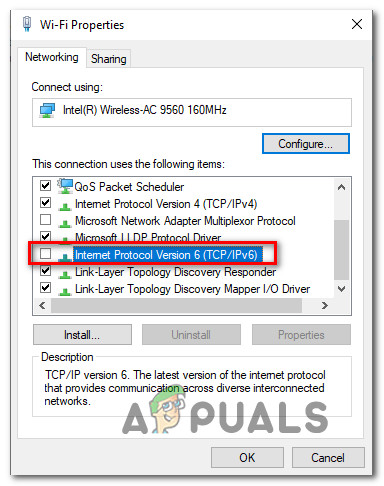
Disabling IPv6 - Click Ok to save your changes, restart your computer, and check if the issue persists.
6. Disable Microsoft Kernel Debug Network Adapter
While Microsoft Kernel Debug Network Adapter is incredibly useful for debugging purposes, its presence sometimes interferes with your regular network adapters operations. By disabling this specialized network adapter, you eliminate any potential issues it might be creating, paving the way for a smooth and uninterrupted network connection.
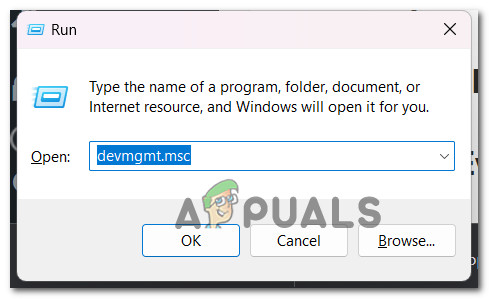
- Press Windows key + R to open a Run dialog box.
- Type devmgmt.msc and press Ctrl + Shift + Enter to open Device Manager with administrative privileges.
Opening Device Manager - Click Yes in the User Account Control prompt.
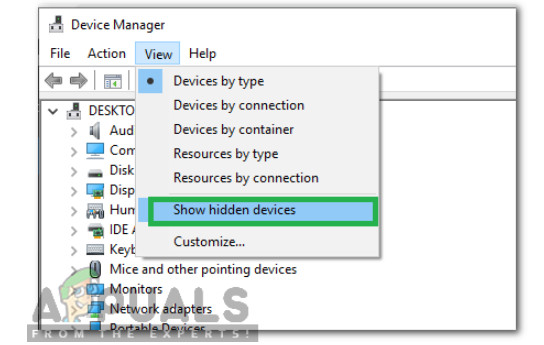
- Within Device Manager, select the View menu and check the Show Hidden Devices option.
Show hidden devices in Device Manager - Right-click on the Microsoft Kernel Debug Network Adapter and select Disable.
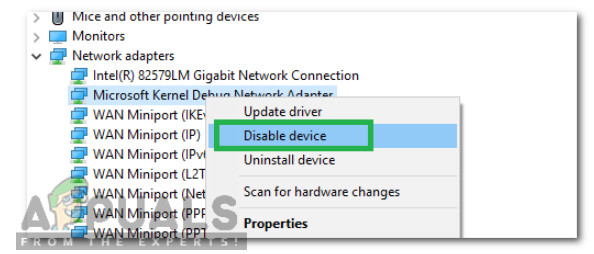
Disable the Kernel Debug adapter - Confirm your action if prompted, then reboot your computer to see if the problem has been resolved.
7. Configure a MAC Address for Your Network Card
Every device on a network is identified by its MAC address, enabling proper communication within the network. If the MAC address is either missing or incorrectly assigned, the network card may fail to communicate with your router or network, leading to the error.
Setting the MAC address manually ensures that your network card has the correct identifier required for network interactions, which can clear up any related configuration issues.
- Press Windows key + R to open a Run dialog box.
- Type cmd and press Ctrl + Shift + Enter to launch an elevated Command Prompt.
Open an elevated Command Prompt - Click Yes in the User Account Control prompt.
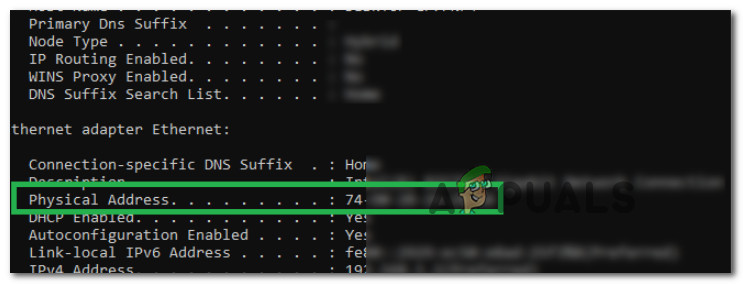
- Type ipconfig /all in the Command Prompt and take note of the Physical Address of your active Ethernet Adapter.
Finding the physical address - Next, go to the Network and Sharing Center in your control panel and select Change Adapter Settings.
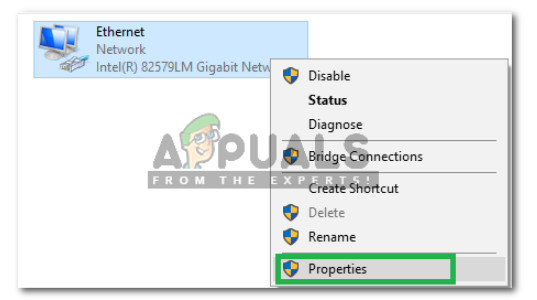
- Right-click your network connection and click Properties.
Accessing Ethernet properties - In the Networking tab, click on Configure (beside your network adapters name).
- Find the Network Address in the list, select it, and input the address you noted earlier.
- Press Ok to save changes, then reboot both your PC and router to see if the issue is resolved.
8. Enable DHCP
DHCP (Dynamic Host Configuration Protocol) is essential for automatically assigning the correct network configuration settings to your computer. If it is disabled, the necessary configurations may not be properly applied, which can trigger the Ethernet Doesn’t Have a Valid IP Configuration error.
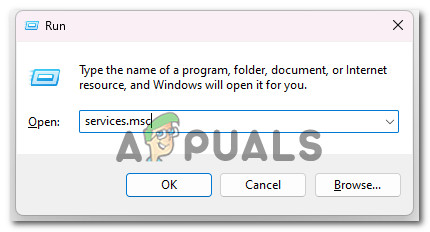
- Press Windows Key + R to open the Run dialog box.
- Type services.msc and press Ctrl + Shift + Enter to open the Services window with administrative privileges.
Accessing the services screen - Click Yes on the User Account Control prompt to grant admin access.
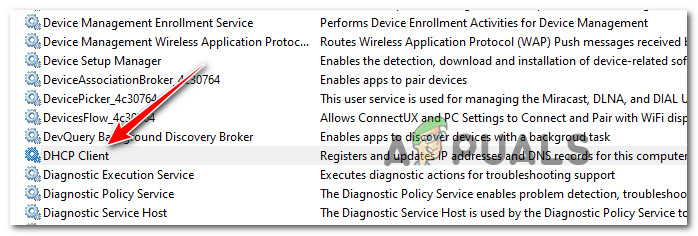
- Scroll down and find the DHCP Client service. Double-click it to open its properties.
DHCP Client properties - Set the Startup type to Automatic and then click on Start if the service is not already running. Click Apply to save the changes.
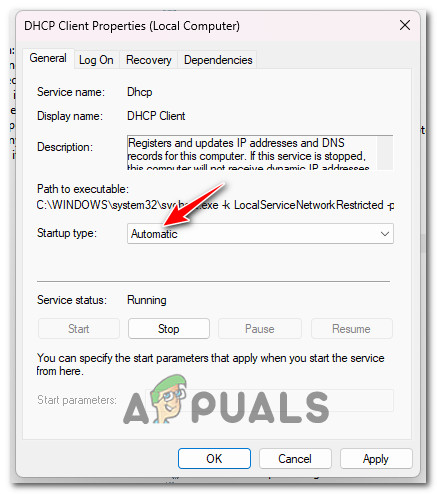
Configuring DHCP service startup type - If the service is already running, you may restart it by right-clicking on the DHCP Client listing and selecting Restart Service.
- Check if the issue has been resolved by reattempting the task that was causing the error.
9. Disable Custom Power Management Customizations
When you disable certain custom power management settings, specifically those related to your network adapter, you can prevent the system from limiting or shutting down the adapter to save energy. This is important because if the network adapter is not fully powered, it may fail to maintain a proper IP configuration, leading to the error in question.
By making sure the adapter receives full power, you keep the network connection stable and consistent, which often solves the problem.
- Right-click on the network icon in the system tray and select Open Network and Internet Settings.
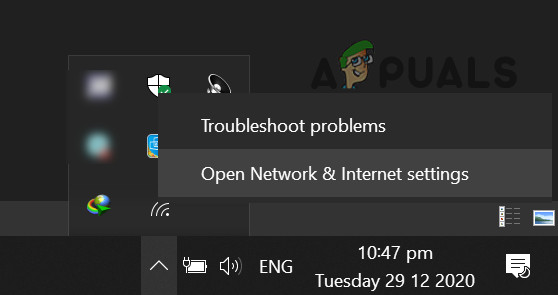
Opening Network and Internet settings - From there, navigate to the Network and Sharing Center. Look for the option to Change adapter settings.
- Disable your network connection temporarily by right-clicking on it and selecting Disable.
- Open the Properties of the active network connection and navigate to the Networking tab. Proceed to Configure under your network adapter.
- In the following window, move to the Power Management tab and uncheck the option Allow the computer to turn off this device to save power.
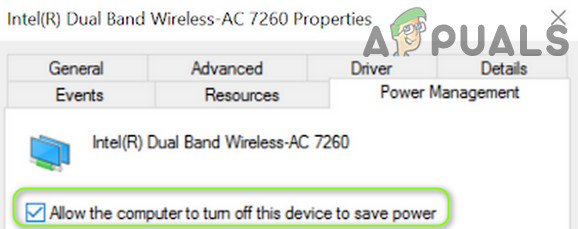
Disabling device power-saving - Confirm by clicking Ok and re-enable your network connection from the Network and Sharing Center.
- Test to see if the network error still occurs after making these changes.
10. Renew Your IP Configurations
When your computers IP address misaligns with the networks expectations due to IP conflicts or stale IP details, refreshing these settings helps to re-establish a healthy communication channel with your network. By releasing the current IP address and obtaining a new one through the commands provided, you effectively reset your network connection to a clean state, which may clear up the error and restore internet access.
- Press the Windows key + R to open a Run dialog box. Type cmd and press Ctrl + Shift + Enter to open an elevated Command Prompt.
Open an elevated Command Prompt - Click Yes in the User Account Control prompt.
- Type the following commands into the elevated Command Prompt and hit Enter after each one to reset your IP configuration:
ipconfig /release
ipconfig /flushdns
ipconfig /renew
- Once youve executed the commands, close the Command Prompt and attempt to perform the action that previously resulted in the error.
If the network error persists after renewing the IP configuration, move on to the next troubleshooting method.
11. Disable 3rd Party Antivirus
A third-party antivirus program, while essential for protecting your computer from threats, can also accidentally block or restrict network traffic due to its firewall settings or network security features. Disabling the antivirus may help determine whether it is the source of the configuration error, allowing network data to flow properly without interference from the security softwares protective filters.
If the error resolves after disabling the antivirus, it indicates that the program’s settings may need adjustment to accommodate correct network operations.
To disable or uninstall your antivirus, follow these general steps:
- Locate the antivirus icon in the system tray, right-click on it, and select the option to disable real-time protection.
- Alternatively, you can uninstall the antivirus from the Programs and Features menu in the Control Panel.
12. Deploy a CHKDSK Scan
The CHKDSK tool cleanses your hard drive for bad sectors and file system errors that could be responsible for a range of issues, including network configuration errors. By fixing these disk-level issues, CHKDSK helps reinstate system stability, potentially eliminating the error. Its a way of making sure the foundation your systems networking relies upon is sound and error-free.
- Search for Command Prompt, right-click on it, and select Run as administrator.
- Type the following command and press Enter:
chkdsk /f /r
- Reboot the computer to allow CHKDSK to scan and repair any disk errors.
13. Install the Network Driver in Compatibility Mode
This approach takes advantage of Windows ability to mimic an older operating system environment, which can be particularly useful when newer software versions encounter issues with current system configurations.
By reverting to Compatibility Mode, you basically guide the driver to operate under conditions it was initially designed for, fixing potential clashes that might cause the error. This can be the key to restoring your network adapters functionality when all else falls short.
- Download the latest network driver for your system.
- Right-click on the driver installation file, select Properties, then Compatibility, and choose an older version of Windows.
- Run the installation as administrator and follow the on-screen instructions.
14. Switch to the Maximum Performance Power Plan
Power plans are designed to manage how your computer uses energy. By default, some plans may prioritize conserving power over maintaining a strong network connection. Switching to the Maximum Performance plan instructs your system to favor performance, which can prevent the network adapter from entering power-saving modes that might disrupt your connection.
- Press Windows key + R to open up a Run dialog box.
- Type in control panel and press Enter to access the classic Control Panel interface.
- Navigate to Power Options in the Control Panel.
- Click on Change plan settings next to your currently active plan.
- Select Change advanced power settings.
- In the advanced power options, find the wireless adapter settings and set it to Maximum Performance.
- Apply the changes, reboot your computer, and check to see if the issue has been resolved.
15. Disable the Virtual Ethernet Devices
These virtual adapters can sometimes interfere with your actual network settings, causing issues such as the Ethernet Doesn’t Have a Valid IP Configuration error. By disabling these virtual adapters, you clear the path for your real network adapters to communicate properly with your router and internet service provider, potentially resolving any IP configuration mishaps.
- Press Windows key + R and type ncpa.cpl, then press Enter to open the Network Connections window.
Opening Network Connections - Right-click on any virtual adapters you may find and choose Disable to turn off these connections.
- After disabling all VEDs, restart your system to see if the Ethernet error has been resolved.
16. Optimize your Network Power Usage
Adjusting power management settings for your network adapter can be important, as excessively high power settings might lead to instability and connectivity issues. By adjusting these settings to optimize for power efficiency, you could potentially reduce excessive power demands which may accidentally cause your network adapter to malfunction or disconnect.
This kind of optimization helps make sure that your adapter maintains a steady connection to the network, potentially resolving the error.
- Open the Run dialog (Windows key + R), type in devmgmt.msc, and press Enter to launch the Device Manager.
Accessing Device Manager - Expand the Network Adapters section, right-click on your network adapter, and select Properties.
- Go to the Advanced tab, look for the Power Output property, and adjust its value if set to 100%.
- Save and apply your changes, then reboot your computer.
17. Allow Ethernet Adapter through BIOS
Enabling the Ethernet adapter in your BIOS makes sure that the motherboard recognizes and activates the built-in network interface, which is important for establishing a wired connection. If the adapter is disabled here, Windows can’t utilize the port, leading to those frustrating Ethernet configuration errors. A quick BIOS toggle might just bring your internet back to life.
- Restart your computer and enter the BIOS during the booting process by pressing the designated key (commonly F2, F10, F12, DEL, or ESC).
- Within the BIOS settings, navigate to the menu related to integrated peripherals or onboard devices.
- Make sure Integrated LAN, Onboard Ethernet, or similar options are enabled.
- Save changes and exit the BIOS.
After adjusting settings in BIOS, boot into Windows and check for the issue again.
18. Uninstall the latest Windows Update
When you uninstall the most recent Windows Update, you’re basically rolling back your system’s state to a point before the update was applied. This can be useful if the update introduced a bug or compatibility issue that affects network settings or drivers.
By reverting to the earlier state, you might eliminate the source of this error, hence restoring your internet connection. It’s a process of elimination that can prove effective if a specific update was the cause for the connectivity problems you’re facing.
- Open the Programs and Features window by pressing Windows key + R, typing appwiz.cpl, and pressing Enter.
- On the left side, click on View installed updates and locate the recent update you want to remove.
- Right-click on the update and select Uninstall.
- Follow the prompts to uninstall the update, then restart your computer.
Be careful when uninstalling updates as this can affect system stability and security. If none of the listed methods resolves the issue and the error persists, additional technical support might be needed.
19. Enable QoS from Router Settings
Activating the Quality of Service (QoS) feature in your router settings allows you to assign bandwidth priority to high-demand devices or applications. By doing so, you help make sure that essential data packets are transmitted efficiently, which could fix configuration issues and restore your Ethernet connection’s functionality.
- Enter your routers IP address (commonly 192.168.0.1 or 192.168.1.1) into a web browser.
- Log in with your routers administrative credentials (default username is often admin with a password of admin or password unless previously changed).
- Find the QoS settings. This can typically be found under Advanced Settings or a similar section.
- Enable QoS and configure it according to your needs or use the default settings if you are unsure.
- Save the changes and reboot your router if necessary.
- Check if enabling QoS resolves your Ethernet connection error.
Keep in mind that router interfaces vary significantly, so you may need to refer to your routers manual for exact instructions.
20. Enable the AutoConfig Service
The AutoConfig service is particularly important as it manages essential elements that your computer needs to connect to networks. By enabling AutoConfig, you confirm that the service is active, allowing your device to automatically select the correct network settings.
This step can easily fix problems where essential protocols are not properly set up, potentially clearing up the error, and restoring your connectivity.
- Press Windows key + R, type cmd, and then use Ctrl + Shift + Enter to open an elevated Command Prompt.
Open an elevated Command Prompt - In the Command Prompt, type the following command and press Enter to enable the Ethernet AutoConfig service:
netsh lan set autoconfig enabled=yes interface=Ethernet
- After running the command, restart your computer and check if the Ethernet issue has been resolved.
21. Reinstall Network-related Dependencies via Net Config
When configurations go wrong or system files get corrupted, this command strips away those complex layers, wiping the slate clean for your network interfaces. Basically, it reverts all your network settings back to their original state, similar to a fresh network installation. This fresh start can often eliminate the issues causing the “Ethernet Doesn’t Have a Valid IP Configuration” error, as it rebuilds network configurations from the ground up.
- Once again, open an elevated Command Prompt by pressing Windows key + R, typing cmd, and using Ctrl + Shift + Enter.
- Type the following command in the Command Prompt window and press Enter:
netcfg -d
This command will remove and then reinstall all your network devices, essentially resetting your networking components.
- After the command has executed, youll need to restart your computer for the changes to take effect.
- Upon reboot, Windows will attempt to reinstall any network devices and configure them to the default settings.
If after attempting all of these methods, you still encounter the Ethernet Doesn’t Have a Valid IP Configuration error, you may need to consult with your internet service provider, consider hardware issues with your networking equipment, or seek further technical support.