Fix: Error Code DC040780 Event ID 17, ‘Security Center Failed to Validate Caller’
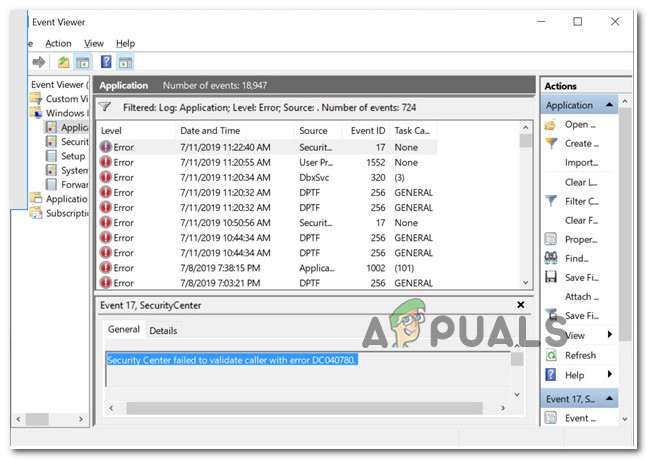
‘Security Center Failed to Validate Caller with Error DC040780’ is a really common error on some computers. There are several reasons for this issue to occur, however, mostly it has to do with the corruption in your Windows Files or there is third-party software that’s conflicting with your Windows Defender and Security Center.
After we’ve investigated this particular issue thoroughly, it turns out that there are several different underlying causes that might trigger this particular DC040780 Event Viewer error. Here’s a shortlist of potential culprits:
- Software conflict caused by Acronis True Image – As it turns out, a fairly common culprit that might be responsible for this issue is a sub-process of Acronis True Image that is conflicting with the Security Center. In this case, you should temporarily uninstall the problematic program and see if the problem stops occurring.
- 3rd party security conflict – Another fairly common culprit is an inconsistency facilitated by McAfee or a different 3rd party suite that is conflicting with a native Windows Defender or Windows Firewall process. In this case, you should be able to resolve the issue by uninstalling the 3rd party suite (and potentially installing a newer app version).
- Windows Defender rejects the 3rd party security component – Keep in mind that with certain security suites, you can expect the native security solutions (Windows Defender + Windows Firewall) to run at the same time as the 3rd party equivalent causing a conflict reflected inside the Event Viewer. To fix this issue and confirm this scenario, you’ll need to disable both Windows Defender and the native firewall component.
- McAffee glitch – In the event that you are using McAfee Antivirus or McAfee Security Endpoint, chances are the problem is occurring due to a glitch that lets Windows Defender run even though a 3rd party equivalent is already active. In this case, you can stop the conflict from producing this error by disabling the native component via Registry Editor.
- Symantec Endpoint Protection glitch – In case you’re seeing this error while using the Symantec Endpoint Protection suite, chances are the problem you’re facing is related to a sub-component of the Security Center. Several affected users that we’re also dealing with this problem have confirmed that the problem was fixed after they have disabled the Security Center entirely from an elevated Registry window.
- Outdated BIOS firmware – On Dell computers, it’s not uncommon to see this error due to a severely outdated BIOS version. Other users finding themselves in a similar scenario have managed to fix the issue by installing the latest available BIOS firmware following the official documentation.
- System File Corruption – Under certain circumstances, a case of system file corruption can also be the underlying cause of this error code. To avoid making any irreversible changes to your machine, our recommendation is to try and treat this issue by performing a repair install procedure.
Now that you are aware of every potential culprit that might be responsible for the apparition of this error code, here’s a list of fixes that other affected users have successfully used to stop new instances of the error from appearing:
Uninstall Acronis True Image 2021 (if applicable)
According to a lot of affected users, one reason why you can expect to see the DC040780 error is a conflict facilitated by Acronis True Image 2021. I know this is an unlikely conflict, but it turns out that some background processes used by this software will determine your Windows 10 OS to throw repeated Event Viewers signaling an issue with the Security Center.
If this scenario might be applicable in your case and Acronis True Image 2021 is installed on your computer, follow the instructions below to temporarily uninstall it and see if this managed to stop the new Event Errors from popping up.
Here’s what you need to do:
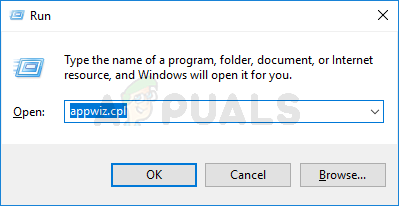
- Press Windows key + R to open up a Run dialog box. Next, type ‘appwiz.cpl’ inside the text box and press Enter o open up the Programs and Features menu. If you are prompted by the UAC (User Account Control), click Yes to grant admin access.

Opening the Programs and Features menu - Once you’re inside the Programs and Features screen, scroll down through the list of installed programs and locate the entry associated with Acronis True Image 2021.
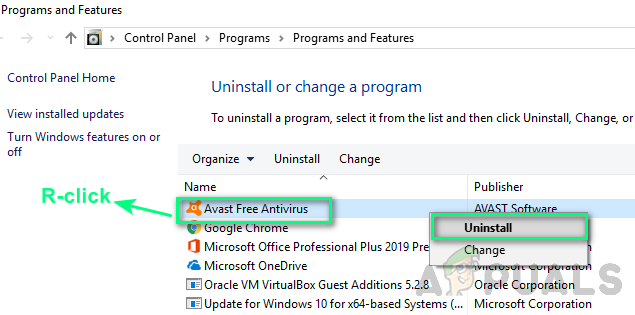
- When you see the listing associated with Acronis True Image 2021, right-click on it and choose Uninstall from the context menu.
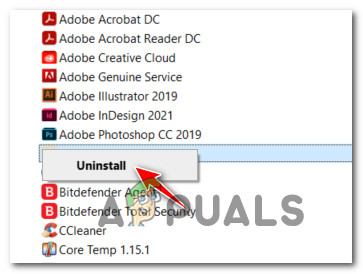
Uninstalling Acronis - Inside the uninstallation screen, follow the on-screen prompts to complete the uninstallation operation, then restart your computer and see if the problem is now fixed.
If this method was not applicable to you, start following the instructions below.
Uninstall or Reinstall the 3rd party security suite (if applicable)
As it turns out, often times this problem is caused by an inconsistency facilitated by McAfee that has since been fixed via an application update.
However, since this particular issue (DC040780 error) also manifests itself sometimes by effectively breaking the auto-update function on McAfee Endpoint Security or McAfee VirusScan, the best course of action is to temporarily uninstall the 3rd party security suite before ensuring that you install the latest version available.
Update: As it turns out, there are other 3rd party security suites known to cause the same kind of issue. Comodo Internet Security is another likely culprit that might cause the error.
If you find this scenario to be applicable in your current situation, follow the instructions below to uninstall McAfee Antivirus from your computer (or a different 3rd party suite) before installing the latest available version:
- Start by pressing Windows key + R to open up a Run dialog box. next, in the Run dialog box that just appeared, type ‘appwiz.cpl‘ and press Enter to open up the Programs and Features screen.
Opening the Programs and Features screen - Inside the Programs and Features menu, scroll down through the list o installed programs and locate the overprotective suite that you plan on uninstalling.
- When you see the context menu, right-click on it and choose Uninstall from the context menu.
Uninstalling the 3rd party screen - Next, follow the on-screen instructions to complete the uninstallation of the security suite, then restart your computer.
Note: To ensure that the operation is successful, you can also follow a series of instructions to remove any remnant files of this security suite. - After your computer boots back up, monitor Event Viewer and see if the same ‘Security Center Failed to Validate Caller’ error is still occurring.

Download the latest version of our AV suite Note: If the problem is still resolved, you just confirmed that your 3rd party security suite was at fault. If you’re fond of your 3rd party av, visit the download page of your preferred antivirus and download the latest version to see if the problem is now fixed.
If the problem is still not resolved or this method was not applicable in your particular situation, move down to the next potential fix below.
Disable Windows Defender + Windows Firewall (Windows 10)
As it turns out, you can also expect to see the DC040780 in a situation where you are using a 3rd party security suite that Windows doesn’t recognize as a viable alternative to Windows Defender + Windows Firewall.
If this scenario is applicable, both security solutions will run at the same time (the 3rd party solution & Windows Security) which might cause conflicts between certain Kernel processes facilitating the apparition of this error code.
Update: This particular scenario is only reported to occur on Windows 10.
In this case, you should be able to fix this problem by accessing the Settings menu of your Windows 10 installation and ensure that both Windows Defender & Windows Firewall are disabled in order to prevent conflict with the 3rd party equivalent.
For instructions on how to do so, follow the steps below to disable Windows Defender + Windows Firewall via the GUI menu of Windows 10:
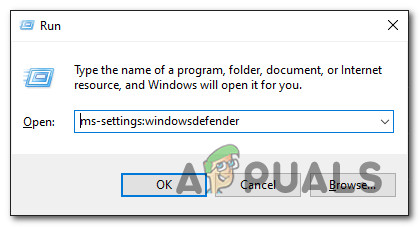
- Start by pressing Windows key + R to open up a Run dialog box. Next, type ‘windowsdefender’ in the text box and press Enter to open up the Windows Security menu. If you are prompted by the UAC (User Account Control), click Yes to grant admin access.
Accessing the Windows Defender screen - Once you’re inside the WIndows Security menu, click on the Virus & threat protection tab, then click on the Manage settings hyperlink (under Virus & Threat protection settings).
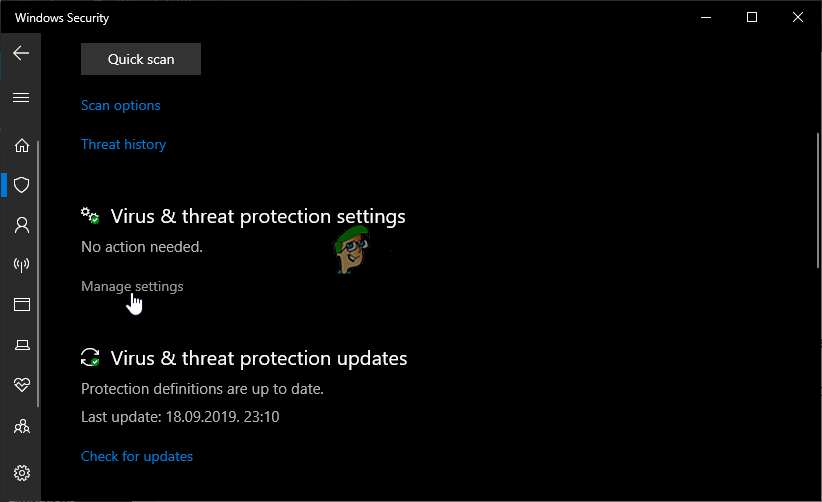
Managing the Windows Defender settings - At the next screen, disable the toggle associated with Firewall & Network protection.
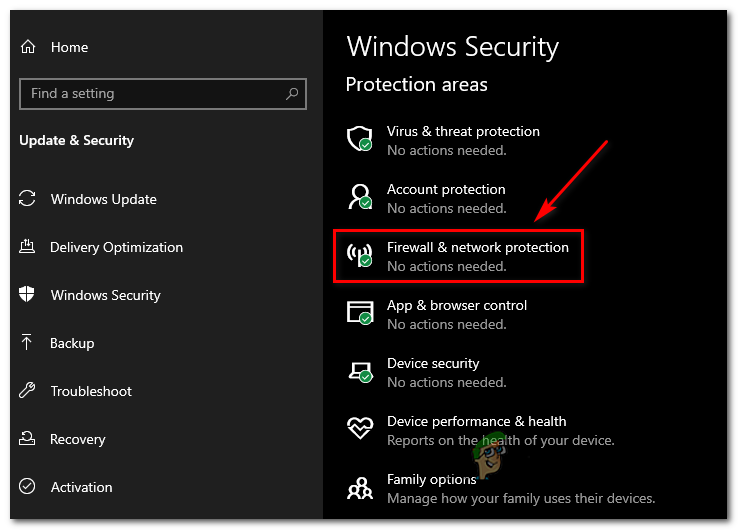
Accessing the Firewall menu - Go all the way back to the first Windows Security window, then click on Firewall & Network Protection.
- After you get to the next screen, click on the network that is currently active, then disable the toggle associated with Windows Defender firewall.
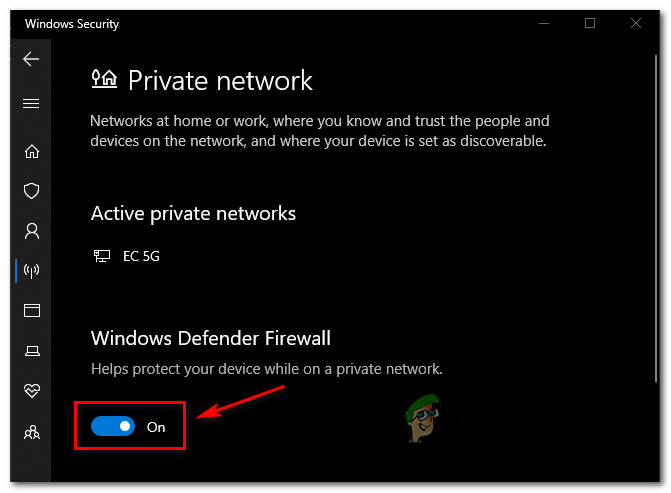
Disable Windows Defender Firewall - After you do this, reboot your computer and check the Event Viewer once again to see if the DC040780 error is now fixed.
If this method was not applicable or it didn’t fix the issue in your case, move down to the next method below.
Disable Windows Defender via Registry Editor (if applicable)
In case you are using McAfee and you couldn’t enforce the fix above because all Windows Defender and Windows Firewall controls are grayed out, you will need to use the Registry Editor to disable the built-in security component.
Several users that we’re also dealing with this problem when using McAfee Antivirus have confirmed that they managed to prevent new instances of the Security Center Failed to Validate Caller (Error DC040780) from occurring by disabling Windows Defender by doing a few registry tweaks.
If you are willing to try this fix, follow the instructions below:
- Start by Windows key + R to open up a Run dialog box. Inside the run box, type ‘regedit’ inside the text box and press Enter to open up the Registry Editor.
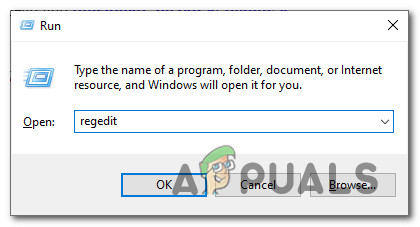
Opening up the Registry Editor Note: If you are prompted by the UAC (User Account Control), click Yes to grant admin access.
- Once you’re inside the Registry Editor, use the menu on the left-hand side to navigate to the following location:
HKEY_LOCAL_MACHINE\SOFTWARE\Policies\Microsoft\Windows Defender
- After you are inside the correct location, move over to the right-hand section, right-click on an empty space and choose New > DWORD (32-bit) Value.
- Next, rename the newly created DWORD value to DisableAntiSpyware and press Enter to save the changes.
- Double-click on the newly created DisableAntiSypware value and set the Base to Hexadecimal and the Value data to 1 before clicking Ok to save the changes.
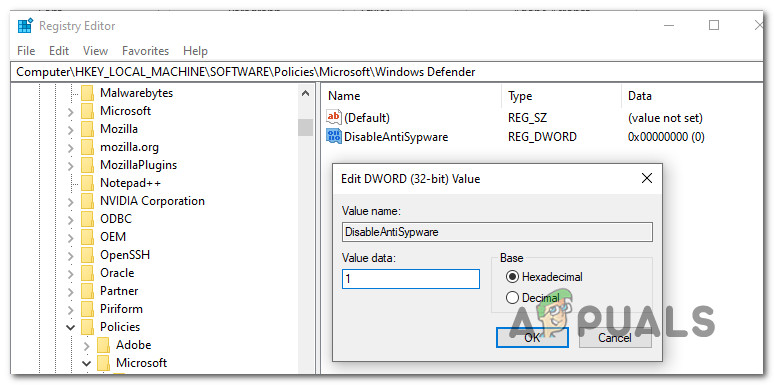
Creating the AntiSpyware value - Restart your machine and see if the problem is now fixed.
If the same problem is still occurring, move down to the next potential fix below.
Disable Security Center (if applicable)
If you are using Symantec Endpoint Protection and your Event Viewer is filled with DC040780 errors that point towards a software conflict, your only hope at fixing the issue while keeping 3rd party suite active is to disable the security center entirely.
Fortunately, there’s a fairly easy way to do this if you don’t mind doing some registry changes that will effectively block the Security Center from springing into action.
Follow the instructions below to open up an elevated Registry Editor window and modifying the values of SecurityHealthService and wscsvc in order to prevent the main Security Service + associate dependencies from being used:
Note: Before you go through the steps below, we recommend backing up your Registry data in advance. This way, in case something goes wrong after this operation you’ll have an easy way to revert back to a working state.
- Press Windows key + R to open up a Run dialog box. Next, type ‘regedit’ inside the text box and press Enter to open up the Registry Editor. When you’re prompted by the UAC (User Account Control), click Yes to grant admin access.
Opening up the Registry Editor - Once you’re inside the Registry Editor, use the menu on the left-hand side to navigate to the following location:
HKEY_LOCAL_MACHINE\SYSTEM\CurrentControlSet\Services\SecurityHealthService
Note: You can navigate to this location directly or you can paste the location directly into the navigation bar and press Enter to get there instantly.
- After you’re inside the correct location, move over to the right-hand side section and double-click on the Start Dword.
- Next, set the Base of the Start value key to Hexadecimal and then change the Value data to 4 before saving the changes.
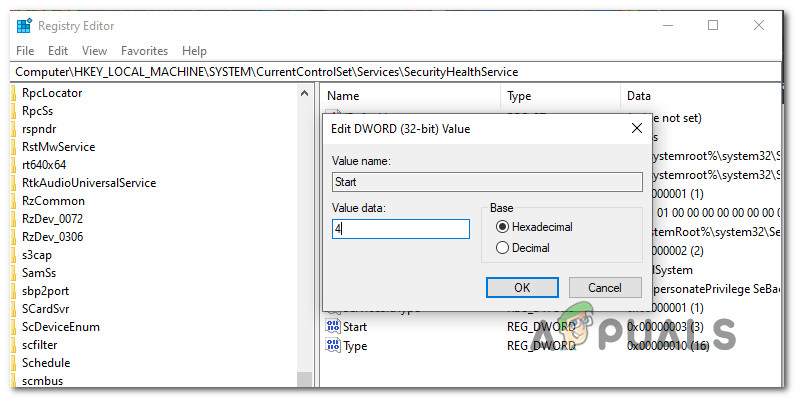
Editing the Start key - After the SecurityHealthService key has been edited successfully, navigate to the following location using the navigation bar at the top do the same thing with the wscsvc cluster:
HKEY_LOCAL_MACHINE\SYSTEM\CurrentControlSet\Services\wscsvc
- Once you arrive inside the correct location, move over to the right-hand section and double-click on Start.
- Same as before, change the Base to Hexadecimal and set the Value data to 4.
- Close the Registry Editor, restart your computer, and monitor the situation inside the Event Viewer to see new instances of the DC040780 error have stopped occurring.
If this scenario is not applicable, move down to the next potential fix below.
Update BIOS Firmware
Some users encountering the issue on desktop computers (mostly on Dell) have reported that they managed to stop these Event Viewers resulting in the DC040780 error after they updating their BIOS firmware.
This is especially useful in those situations where these errors precede an eventual system crash.
But it’s important to understand that the exact procedure of updating your BIOS version is very different according to your motherboard manufacturer.
Warning: Also, this operation might end up creating additional stability issues with your PC if you follow the steps incorrectly. Because of this, we only recommend you to update your BIOS firmware if you did it before and you are confident that you will be able to pull it off according to the instructions provided by your motherboard manufacturer.
The exact steps of updating will vary from configuration to configuration, so we recommend following the appropriate documentation according to your manufacturer.
Here are some helpful links from the most popular manufacturers that will help you update the BIOS version:
Important: If your motherboard manufacturer is not in the list above, search online for specific steps.
If your Bios version is updated but you’re still encountering this issue consistently, move down to the next potential fix below.
Deploy a repair install
If none of the potential fixes above have worked for you, it’s likely that you’re dealing with some type of corruption that is affecting your operating system’s ability to mitigate normal system events.
In this case, you should try to resolve the error code by refreshing every Windows-related file.
You can also accomplish this with a clean install procedure, but our recommendation is to go for a repair install (in-place repair) instead.
While a clean install will not discriminate and delete everything on your OS drive (unless you back it up in advance), a repair install will only touch OS components, leaving personal files, apps, and games intact.