How to Fix Error Code ‘Chard’ in Destiny 2
The Error Code ‘Chard‘ typically appears when Destiny 2 players attempt to launch the game or after they are booted to the main menu when trying to play a Public event. This problem seems to be exclusive to PC and is most commonly reported to occur after a particular Windows Update is installed.

As it turns out, there are several different causes that might end up causing this particular error code. Here’s a shortlist of potential culprits:
When troubleshooting this particular issue, you should start by checking if the game is not currently facing server issues that might create instability issues. To do this, check the status page of Destiny and Twitter for any announcements regarding any outage or maintenance sessions regarding Destiny 2.
Once you confirm that you’re not actually dealing with a server issue, try seeing if the problem is actually being caused by a login issue. Several affected users have confirmed that the error code was resolved after they logged out of their Battle.net account and logged back in after restarting the client.
However, the Chard error code can also be facilitated by some kind of system file corruption that ends up affecting the stability of the game. If this scenario is applicable, you should be able to fix the problem by running the repair function on Battle.Net or by running an integrity check on Steam.
With certain ISPs, this problem can also be facilitated by a network inconsistency. To resolve it, you can go for a network reboot to clear any temp data that’s currently stored. If this doesn’t work, the final step should be to go for a router reset.
Checking for Server Issues
Before you attempt to fix the issue locally, you should start this troubleshooting guide by ensuring that the problem is not beyond your control. Keep in mind that while this error code (chard), topically points to a local issue, it’s also possible that a widespread server issue is actually causing the problem and preventing you from doing certain activities in Destiny.
To verify this theory, start by checking if other users from your area that are currently playing the game have the same issue. To do this, you can use DownDetector or Outage.Report to see if the problem is widespread.
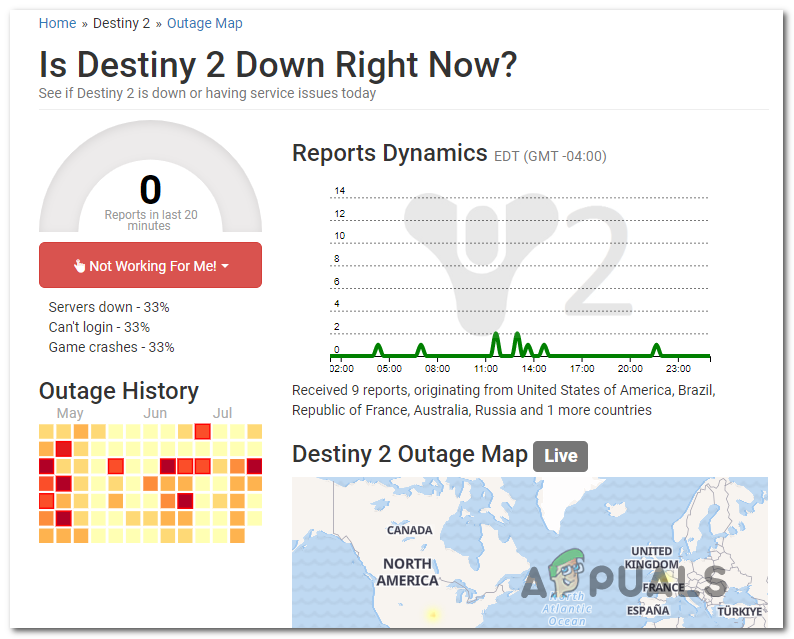
If you uncover evidence that other users in a similar situation are having the same issue, check the status page of Destiny and Bungie’s official Twitter support account for any announcements regarding a server issue.
In case these investigations you just performed haven’t uncovered any underlying server issues with Destiny 2, move down to the next method below to begin troubleshooting for a local issue.
Restarting Battle.Net & Re-Signing In (if applicable)
In case you’re getting regular disconnects while playing Destiny 2 on PC, chances are you’re actually dealing with a credential issue that seems to affect a wide number of players. The majority of affected users that managed to resolve this issue have confirmed that the problem was finally resolved after they logged out our Battle.Net, restarting the application and then logging in once again.
However, some users that deployed this fix have said that this fix is not permanent – The ‘Chard‘ error code might return after some time, in which case, you will need to perform the repair steps once again.
Here’s a quick guide on restarting Battle.Net, signing out of your account and then logging in again to avoid the Chard Error in Destiny 2:
- Inside Blizzard’s Battle.Net application, click on your account (top-right corner of the screen), then click on Log Out from the newly appeared Context menu.

Logging Out of Battle.Net - Confirm the operation, then wait for your account to be logged out of Battle.Net.
- Next, open up your tray-bar menu, right-click on the icon associated with Battle.Net and choose Quit from the context menu. This will ensure that Battle.Net is closed of completely.

Closing Battle.Net - After a couple of seconds, you can launch the Battle.Net application once again and sign in with your account.

Signing with your account once again - Launch Destiny 2 once again and see if you still end up encountering the same Chard error code.
In case the same problem is still occurring, move down to the next potential fix below.
Scan & Repairing the Game
As it turns out, the error code Chard can also occur due to some type of game file inconsistency or corruption that ends up affecting the stability of Destiny 2. If this scenario is applicable, you should be able to resolve this problem by performing a scan & repair procedure using the Battle.net app or an integrity check on Steam.
This operation will end up cross-checking the integrity of each Destiny 2 game file and replace any corrupted equivalents with healthy copies downloaded directly from the Battle.net servers or Steam servers.
If you suspect corruption might be the main cause behind the apparition of this error code, you will need to perform an Integrity Check (on Steam) or a Scan & Repair procedure on Battle.Net.
In case you’re using Battle.net, follow sub Guide A. For Steam, follow sub guide B.
A. Repairing the Game using Battle.Net
Follow the instructions below to Scan & Repair the Destiny 2 game directly from the Battle.net app:
- Ensure that the main Destiny 2 application is closed, then open Battle.Net app and click on the Games tab from the top of the screen.
- Next, select Destiny 2 from the list of games in the left-hand section of the screen.
- After you do this, move over to the right-hand side menu and click on Options and click on Scan & Repair.
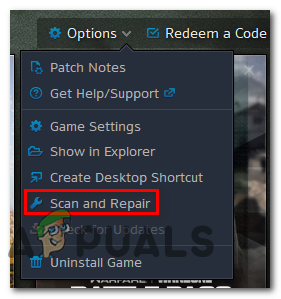
Running a Scan & Repair on Destiny 2 - At the final confirmation prompt, click on Begin Scan and wait for the operation to complete.
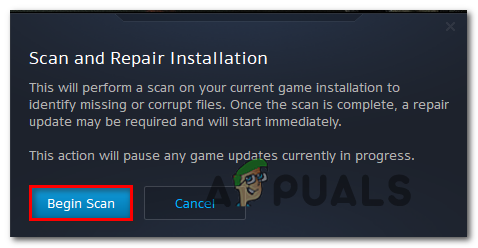
Starting a Scan & Repair procedure using the Battle.Net app - Once the operation is complete, restart your computer and launch the game once the next startup is complete to see if the problem is now fixed.
B. Repairing the Game on Steam
Follow the instructions below to scan the integrity of the Destiny 2 game file and see if the problem resolves itself:
- Ensure that Destiny 2 is closed, then open Steam and access the Library tab from the menu at the top.
- Next, select Destiny 2 from the list of games in your library, then right-click on it and choose Properties from the context menu.
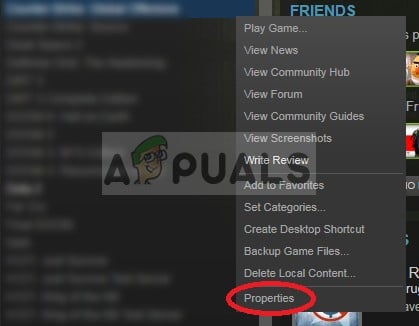
Opening Game Properties in steam - Inside the Properties screen of Destiny 2, click on the Local Files tab, then click on Verify Integrity of the game files from the list of available options.
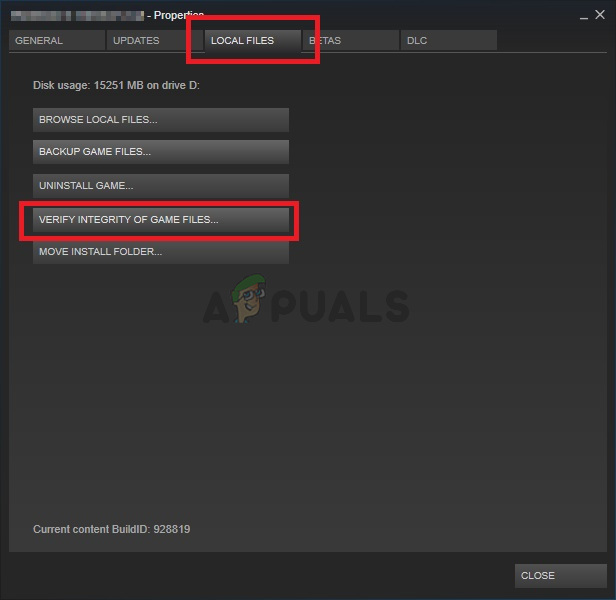
Verifying the integrity of game files - Once the verification is started, wait patiently until the operation is complete, then restart your computer.
- After the next startup is complete, launch Destiny 2 once again and see if the issue is now resolved.
In case the same problem is still occurring, move down to the next potential fix below.
Restarting or Rebooting the Router
In case none of the potential fixes above have worked for you and you have previously confirmed that you’re not actually dealing with a server issue, it’s very likely you’re dealing with a network inconsistency.
Routers working with limited bandwidth are likely might trigger this error after being flooded with data they cannot handle. In most cases, this will occur after too many devices are connected to the same network and a lot of data is being exchanged at the same time.
In this case, you should be able to resolve the ‘Chard’ error either by rebooting the router or by resetting it.
Start with the first sub-guide (A) and perform a simple reboot. If that doesn’t work, move down to the process of rebooting your router.
A. Rebooting your Router
This is the ideal procedure to start with in case you are encountering connectivities issues with other games (other than Destiny 2). This operation will clear the temp TCP / IP data without causing any data loss.
Some users encountering the Chard error code in Destiny 2 (at random intervals) have confirmed that the problem was finally fixed after they restarted their router.
To perform a router reboot, simply press the On / Off button on the back of your router once to cut off power. If your router does not have an On / Off button, physically disconnect the power cable to force a manual restart.

Once you turn your router off, disconnect the power cable and wait for a full minute to ensure that you clear the power capacitors.
After you have successfully managed to reboot your router, restart your computer and see if the problem is resolved by launching Destiny 2 once again and see if thee Chard error code returns.
In case the error code comes back, proceed by resetting your router.
B. Resetting your Router
If a simple reboot didn’t work, you should move forward with resetting your router. But before you do this, keep in mind that this operation will likely end up clearing any personalized settings that you might have previously established – This includes custom login credentials, whitelisted ports and IP ranges that you allowed but also blocked items and ports that you forwarded manually.
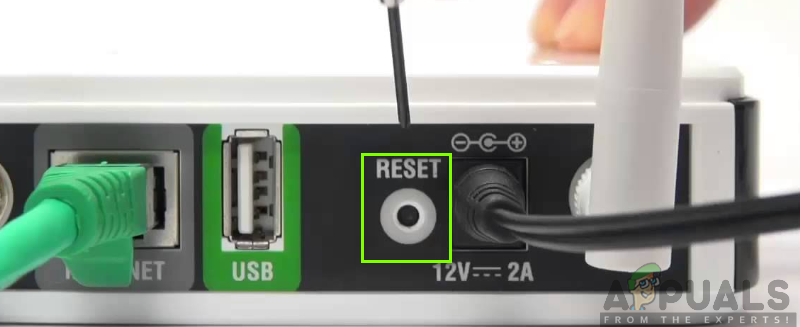
If you understand the consequences and you want to star the operation, look for the reset button on the back of your router. Once you see it, you’ll likely need a toothpick or a similar sharp object to reach it – Most manufacturers will build it this way to avoid accidental presses.
Keep in mind that some router models will ‘forget’ the currently saved ISP credentials once the reset is performed. Because of this, is important to have the ISP credentials at your disposal before initiating this procedure.
When you are ready to get started, press and hold the Reset button for 10 seconds or until you see that the LEDs a the front of your router all start flashing at the same time. Once the procedure is complete, release the reset button and wait for the Internet Connection to be re-established.
Note: Depending on your router model, you might need to reinsert the credentials provided by your ISP.
Once the Internet connection is re-established, launch Destiny 2 once again and see if the issue is now resolved.


