Diskpart Manual (Commands and Instructions)
Disk Management is one of the most important tasks you need to accomplish for better performance and accessibility. There is a specific program inside Windows called Disk Management that has an easy-to-use UI and can perform most of the tasks but what if you can’t get that program to work or you want more grasp on your disk management or your Windows isn’t booting up normally? These are the situations where you would need a pretty neat utility called DiskPart.
As its name represents, it is a tool, in fact, it is a command-line tool used for disk management using a simple command prompt. It can perform various operations from listing the disks and partitions details to deleting and creating new partitions. So, you get a better hold on your disk management using DiskPart inside Windows.
DiskPart was first made available in Windows XP and it is still integrated inside the latest version of Windows i.e. Windows 10. DiskPart works with numerous commands that are used to perform different operations on a selected disk or partition. All you need to do is to select a target disk or partition and you can do anything you desire.
So, in this guide, I am going to explain some of the most useful commands you can use to manage your disks using the DiskPart utility tool.
How to Launch the DiskPart Utility Tool?
Launching the DiskPart utility tool is pretty straightforward if you are booted to your specific version of Windows. Follow the instructions below to launch DiskPart.
Launching DiskPart if Booted to Windows:
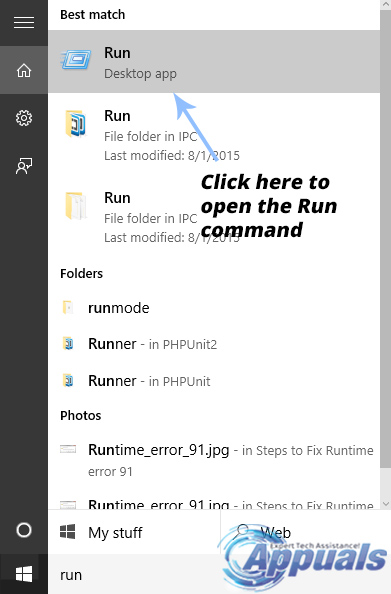
There are different ways of launching this utility tool but here is a universal method of launching it in any version of Windows. If your Windows is running normally, then, you can launch the DiskPart utility tool by opening the Run Command. You can open Run by typing this inside the Start Menu search area.
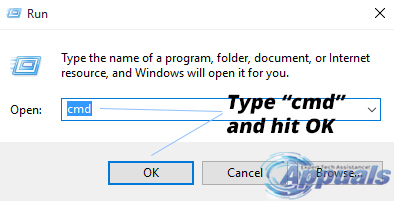
Now, you need to open the Command Prompt in order to access DiskPart. Type cmd inside the Run command area and hit the Enter key on the keyboard. It would launch the Command Prompt.
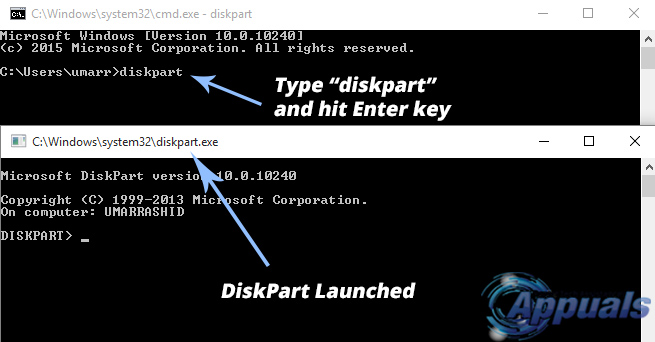
Inside the Command Prompt, type diskpart and hit the Enter key again. Your command prompt will launch the DiskPart utility tool in a new window with some of your computer’s info at the top.
Launching DiskPart if you can’t Boot to Windows:
To launch DiskPart if you can’t boot to Windows is a bit complicated. All you need to do is to access Command Prompt at the start-up of your PC. Accessing the Command Prompt is different based on different versions of Windows.
Windows 7:
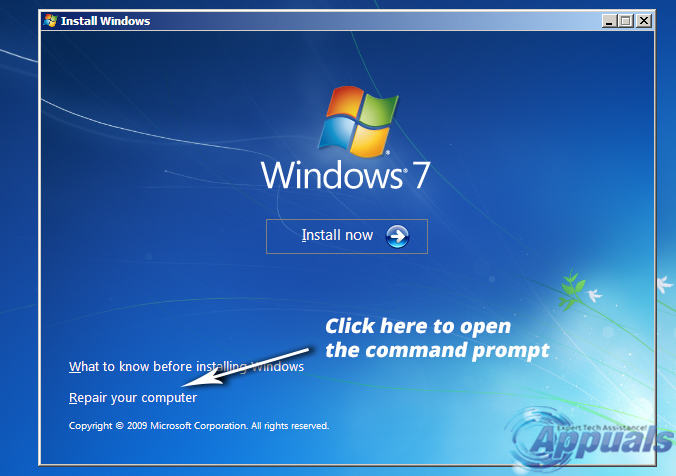
The best and the most convenient way of launching the command prompt if you can’t boot to your Windows 7 is to use a bootable Windows 7 USB drive. Plug-in the USB to your PC and hit any key when prompted to boot from the USB. On the Windows 7 installation screen, you would find an option i.e. Repair your computer at the bottom.
Select the OS from the list and click Next to move to the next window. Click on Command Prompt at the bottom and type diskpart followed by the Enter key.

Windows 8 and 10:
In Windows 8 and10, you can access the DiskPart by restarting the PC and holding the Shift + F8 key combination to open the advanced menu. Click on Troubleshoot and select the Command Prompt. Type diskpart inside and hit Enter.
DiskPart Commands and Instructions:
The heart and soul of the DiskPart utility are the commands used to perform different operations. These commands are case-insensitive and can be conveniently utilized to manage your disks. Here are some of the most important commands you would require at the time of Disk Management.
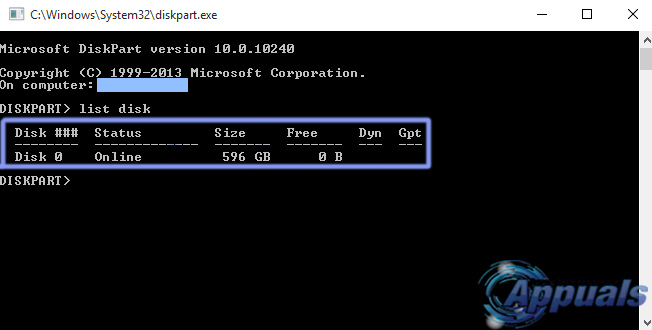
list disk:
If you want to output a list of all the disks currently connected to your PC, then, this command comes in quite handy as it displays a bunch of information including the total number of disks, the status of the disk and size of the disk, etc. In my case, I have only one disk connected to my PC.
Syntax: list disk
This command might show the “No Fixed Disks to Show” error if it isn’t executed properly.
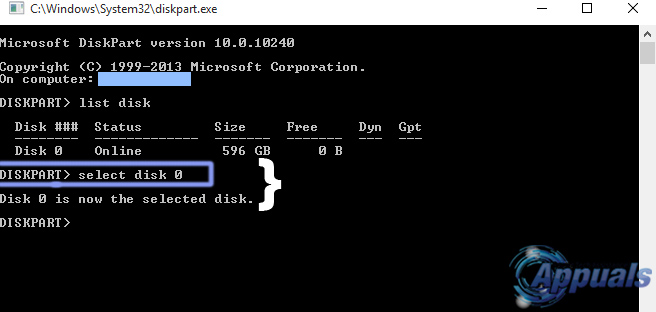
select disk:
To select a particular disk connected to your PC, you can use select disk command along with the disk number. In my case, I will select Disk 0. It will display a message that the particular disk is now selected.
Syntax: select disk 0 (“0” is the number of disk in my case)
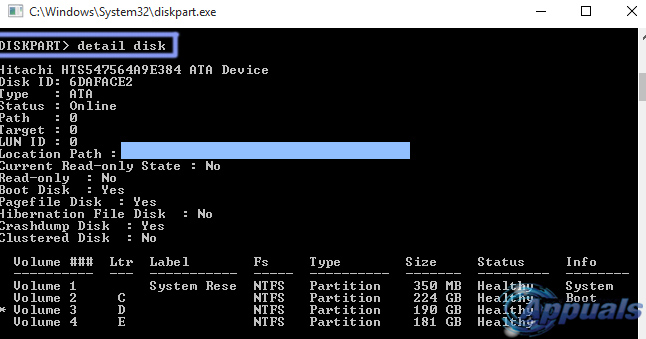
detail disk:
This command is used to view complete details about the selected disk. It is pretty useful on certain occasions where you need extensive info about a disk.
Syntax: detail disk
delete disk:
Delete disk command is used to delete a missing dynamic disk from the disk list. This command should be used carefully as it might lead to some serious issues.
Syntax: delete disk
list partition:
Now, you would like to have a glance at the partitions in your selected disk. So, DiskPart has a pretty neat command for that purpose. All you need to do is to type list partition in the prompt and hit Enter. It would display a list of all the partitions along with their numbers and sizes etc.
Syntax: list partition

select partition:
To set the focus of the DiskPart utility to a specific partition inside the select disk, you can use the select partition command along with a number of the partition displayed. In my case, I will set the focus to Partition 3. So, the syntax will be as below.
Syntax: select partition 3 (“3” is the number of partition in my case)
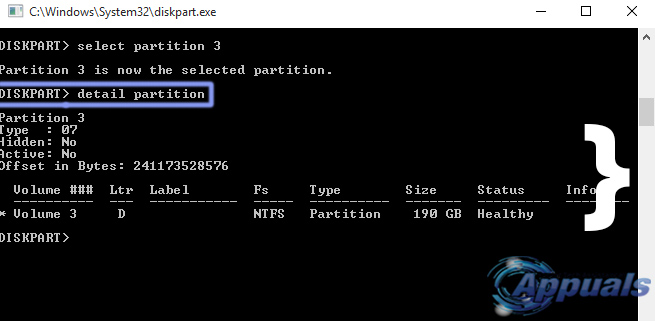
detail partition:
You can use the detail partition command to view the details of the currently selected partition. You can select any partition using the select partition command mentioned above. In my case, I will view the details of the partition # 3. For this purpose, I will select partition # 3 and execute the detail partition command afterward.
Syntax: detail partition
delete partition:
To delete the currently active partition, delete partition command can be used. It is recommended that you should select the partition first using the select partition command and then, use the delete partition command to delete it. Also, you can encounter the access is denied error if the command isn’t executed properly.
Syntax: delete partition
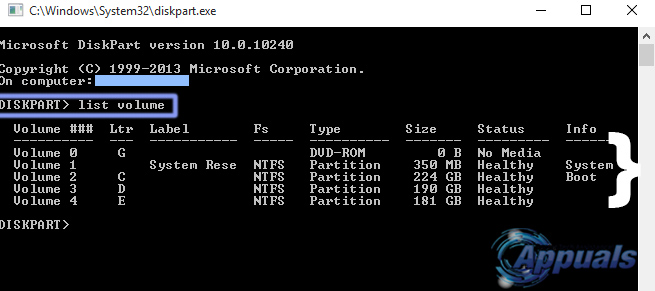
list volume:
Volumes on a PC can be viewed using the list volume command inside DiskPart. It displays all of the volumes available on the computer along with some basic info. In my case, there are five volumes available on my PC.
Syntax: list volume
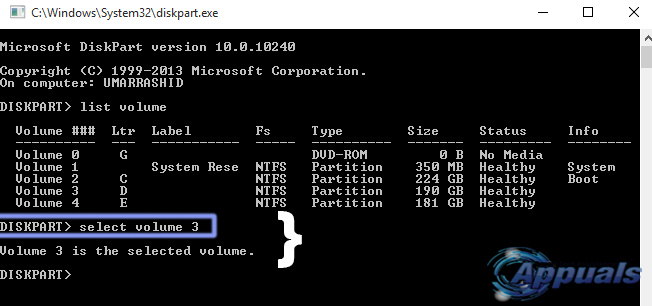
select volume:
To select a particular volume, you can use the select volume command along with the number of the volume listed above using the list volume command. In my case, I will select the third volume.
Syntax: select volume 3 (“3” is the number of the volume in my case)
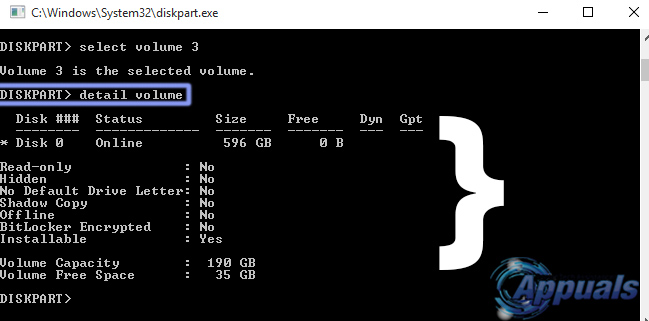
detail volume:
Details of a selected volume can be viewed using the detail volume command. It displays a whole list of info regarding the selected volume. In my case, as I had selected the volume 3, so, detail volume command displayed the details of the 3rd volume on my PC.
Syntax: detail volume
delete volume:
A volume can be deleted the same way as a disk or a partition. So, to delete the selected volume, you can utilize the benefits of the cool command called delete volume.
Syntax: delete volume
create volume:
Creating a volume is quite easy. You can create a simple volume by using the command i.e. create volume simple along with a few attributes including size (MBs) and disk number. If you don’t specify the size or disk number, basic settings will be adopted to create a new simple volume. The same goes with create volume stripe and create volume raid command with a little bit of difference in disks.
Syntax:  create volume simple [size] [disk #]
Syntax:  create volume stripe [size] [disks (two or more than two)]
Syntax:  create volume raid [size] [disks (three or more than 3)]
format:
One of the most important commands used inside DiskPart is format. You can format any volume using this command. You should first select the volume you want to format using select volume command before using the format. You can also specify various parameters to get the desired results.
Syntax:  format FS=NTFS label=”My Drive” Quick Compress

FS: FS represents the file system.

Label: label is the name of your drive. You can write anything.

Quick Compress: It compresses the drive accordingly.

create partition:
There are various commands dependant on the type of partition you need to create. You can create a primary partition by using the create partition primary command along with some option parameters including the size (MBs) and offset. You can also create extended partitions and logical partitions using create partition extended and create partition logical commands respectively.
Syntax: create partition primary, logical, extended [size] [offset]
convert mbr:
To convert an empty disk with GPT partition style to MBR partition style, you can use convert mbr command keeping in mind that the disk should be empty. Otherwise, you might lose all of your data.
Syntax: convert mbr
convert gpt:
To convert an empty disk with the MBR partition style to GPT partition style, you can use convert gpt command keeping in mind that the disk should be empty. Otherwise, you might lose all of your data.
Syntax: convert gpt
rescan:
The best advantage of using the DiskPart utility tool is its ability to rescan for the I/O buses along with any newly added disks to the computer. This can be done through a single command called rescan.
Syntax: rescan
The above-mentioned commands are just the basic ones that are mostly used inside the DiskPart utility. For a detailed reference, you can navigate to this link.