How to Configure the UFW Firewall in Linux
UFW actually stands for Uncomplicated Firewall and not Ubuntu firewall like many people believe. This name reflects the fact that it’s surprisingly easy to configure. Most users will only need to set literally three options before they’re relatively safe. Those who want to set some advanced configuration options won’t have to do much beyond editing a text file. While Ubuntu project developers originally designed this particular piece of firewall software, ufw is also available in many other distributions too. Debian, Arch, Linux Mint, Lubuntu and Xubuntu users more than likely already have it installed.
The problem is that comparatively few users have it switched on. While users no longer have to directly work with iptables, Ubuntu forces ufw to default to the off state. Many implementations of Debian don’t even have the packages installed by default. The good news is that anyone with the slightest bit of terminal experience can harden their system.
Method 1: Turning on UFW from the Command Prompt
Assume you have the ufw package installed before you attempt to install it separately. Run these commands before anything else. If you experience any errors midway through, then you can always go back and install ufw packages later without any problem.
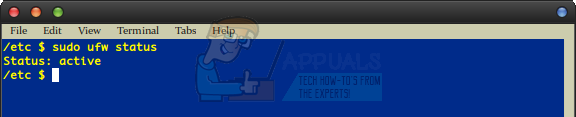
If you’re working from a standard user account, then run sudo ufw enable and type your administrator password if prompted for it. You should be told that ufw is enabled and will run automatically on startup. Run sudo ufw status anyway just to be sure. You should be given a single line of output that reads “Status: active” with nothing after it.
On the other hand, you might have been told that ufw isn’t installed. Users of apt-based distributions like Debian should run sudo apt-get install ufw. You may wish to run sudo apt-get update and then sudo apt-get upgrade to make sure your other packages are in order when installing. Arch Linux users will need to run sudo pacman -Syu if they want to get their packages in order and then sudo pacman -S ufw to install ufw, but all users will be able to continue like normal afterwards. Follow the steps above and make sure that running sudo ufw enable returns the aforementioned “Status: active” line.
Method 2: Sending UFW a Basic Set of Rules
Firewall tools use a set of rules to check whether to accept a packet sent to your computer across a network. You will almost certainly want to run these two commands next:
sudo ufw default allow outgoing
sudo ufw default deny incoming
This ensures that ufw always allows you to send outgoing traffic to your network adapter, which is important if you do any kind of work online. Naturally, you shouldn’t consider any outgoing request dangerous. This also bans incoming requests from doing any harm, which is the correct setting for almost all home and business users. Even most gamers who play intensive online FPS titles shouldn’t need anything more than this. Most people can stop here as long as running sudo ufw status still returns an enabled message even after you reboot the machine. There’s not much else to the configuration process. Users with any sort of ssh or advanced networking goals need to move on.
Method 3: Advanced UFW Configuration Options
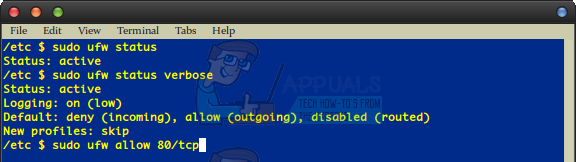
Most users won’t need to read onwards, but these rules might be useful for some. For instance, if you needed to allow tcp connections on the common 80 port you could run:
sudo ufw allow 80/tcp
You could also use sudo ufw allow from ###.##.##.##/## with a real IP address and an actual subnet number after the slash mark. Keep in mind that 80 is a valid number for this use if you need to perform networking over it. Using something like sudo ufw allow http/tcp is also valid and may be needed in a server situation, but this really starts to open up a can of worms as far as permitting different types of connections.
One of the more popular settings is sudo ufw allow 22, which opens the port for ssh connections. Some users instead phrase it as sudo ufw allow ssh, which works just as well. While some guides might instruct you to add both lines, this is unnecessary in a majority of cases and may just contribute to an unnecessary amount of overhead in the end.
When you want to remove one of your rules in the future, you can simply run sudo ufw delete followed by the rule name. For instance, sudo ufw delete allow 80/tcp would turn off one of the examples we made above.
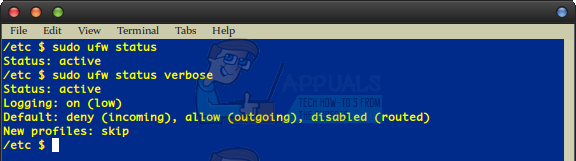
Now when you run sudo ufw status verbose you might see a far more complete table if you’ve created additional rules. Should you ever wish to disable the firewall in the future you could run sudo ufw disable, but there are very few situations where you’d need to do this.
Occasionally you might find that you get 504 gateway time-out errors if you’re using ufw in this way to protect a server. Changing the order of a few rules might help if this is the case. Allow rules must be entered before deny rules since ufw always looks for the first match when parsing your list for security reasons. Deleting a pair of rules and then adding them back by typing the sudo ufw default allow line first should fix this problem. You might wish to additionally delete any duplicate lines for performance reasons as well.
Run sudo ufw verbose and pay close attention to what order your DENY IN and ALLOW IN lines are in. If you have something on a common port like 80 or 22 that reads DENY IN followed by Anywhere on the chart before other references to those ports, then you might be attempting to block connections before they have a chance to get through. Reordering them will fix the problem. Putting these commands in the correct order in the first place will help to prevent problems later on down the line.
Elevated root prompt users won’t actually have to use sudo before each command. If you’ve been receiving some kind of error about that, then this might be your issue. Check the end of your prompt to see if you have a # or $ before your cursor. Users of tcsh who only have a % for a prompt should run whoami to see what user they’re operating as.
Regular users who run sudo ufw status verbose will more than likely still receive comparatively little feedback after their prompt. You’ll probably simply see the same line you had before.
This is because these users are simply working with very few rules. A word of caution might be important regarding these rules, however. While the ufw default command additionally allows you to use the reject parameter, you can very easily lock yourself out of your own private server structure or do some other strange things. If you need to have a sudo ufw allow ssh or other similar lines in your rule set, this needs to come before you apply default reject or deny rules.
While some graphical tools exist like Gufw and the Qt-based kmyfirewall, it’s easy enough to configure ufw from the command line that you won’t actually need them. Should you have any need to edit the configuration files directly instead, use the ![]() command to move over to the proper directory and then use sudo nanofw to edit it. You might also want to initially use more ufw or less ufw to simply view the text first before you make any changes.
command to move over to the proper directory and then use sudo nanofw to edit it. You might also want to initially use more ufw or less ufw to simply view the text first before you make any changes.
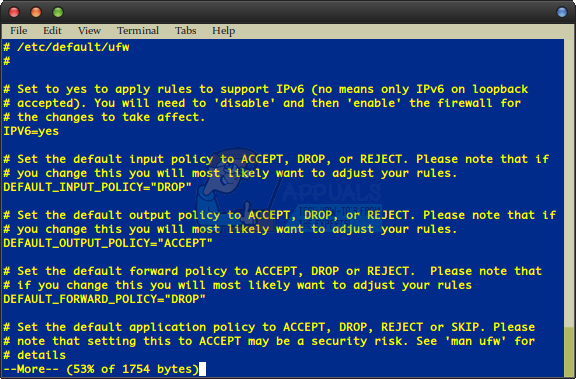
The developers actually took the time to provide appropriate comments so you wouldn’t get lost when editing it, though you may wish to remove this if you felt the need to.