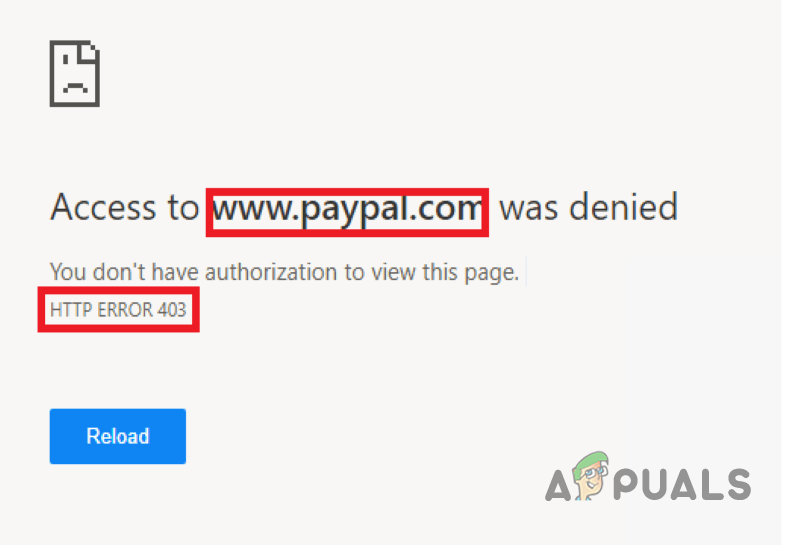
How to Fix 403 Forbidden Error on PayPal
 Reviewed by Muhammad Zubyan
The PayPal 403 forbidden error can occur when you are trying to either make a transaction via the platform or access the website in general. The error message means your IP address does not have access to the requested address. This can usually occur if your ISP or the website is blocking your IP address from accessing PayPal, using a third-party VPN to mask your real IP address and more.
In some cases, using a different network connection to access the PayPal platform can often resolve the issue. In this article, we will take you through a number of methods that you can implement to fix the error message in question.
1. Use a Different Browser
The first thing that you should do is to use a different browser on your device. In some scenarios, the issue can be related to an inconsistency with the request that is being sent by your browser which can often occur due to the third-party extensions installed.
In such a scenario, we recommend trying a different browser on your system to see if that allows you to access the PayPal website. Alternatively, you can also try giving the incognito mode on your browser a shot since all of the third-party extensions are disabled there by default. The issue is not always related to the extensions on your browser which is why installing a different browser on your system is not something you should skip.
If the problem persists even on a different browser, move to the next method below.
2. Use a Different Network Connection
The network connection that you are using can be another cause of the error message in question. This can happen when your IP address is blocked by the platform for various reasons, which can include spam protection and more. This usually happens when you are using a shared WiFi network.
In such a scenario, you will have to switch to a different network connection to resolve the problem. Using your mobile data to access the website is one solution to the issue in question. Switching your network connection will give you a new online presence with a new public IP address which will be able to go through the firewalls put in place by PayPal. If the problem persists even after switching your network connection, move to the next method below.
3. Clear Browser Cache and Cookies
The 403 Forbidden error message on PayPal’s website can also be due to the presence of browser cache and cookies. When you access a website, the website stores cookies on your browser for various reasons, which can include managing your user session, and more. In addition, the browser cache is regularly updated to enhance the website’s performance on your browser.
Nevertheless, there are situations where discrepancies in browsing data can lead to the error message in question. If you encounter such a scenario, clearing your browsing data becomes necessary to resolve the issue. Follow the instructions below to clear the browser cache for your respective web browser.
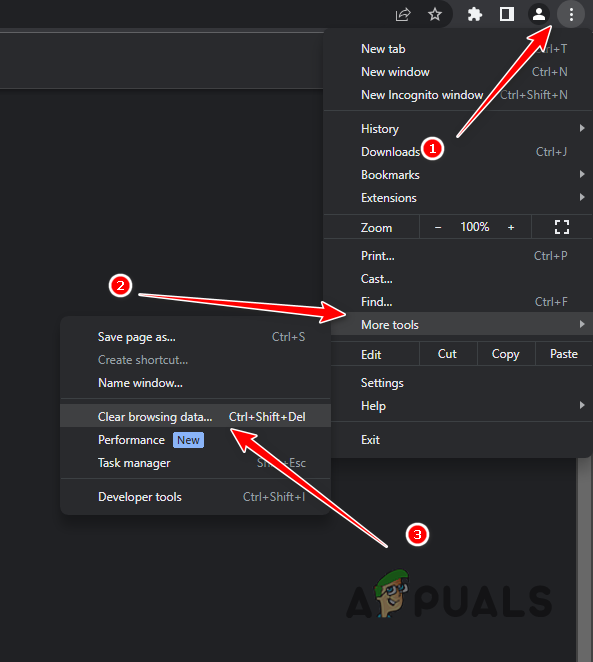
Google Chrome
- First, click on the More menu button in the top-right corner.
- After that, navigate to More tools > Clear browsing data from the drop-down menu.
Navigating to Clear Browsing Data - Choose All time as the Time range.
- Then, select the Cookies and other site data and Cached image and files checkboxes.
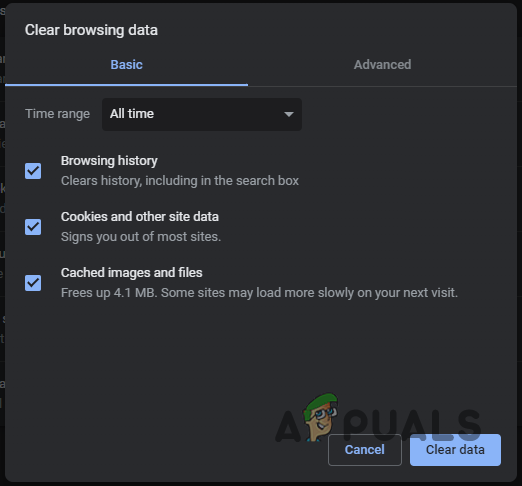
Clearing Browser Cache on Google Chrome - Finally, click Clear data.
Microsoft Edge
- Click on the More menu button in the top-right corner.
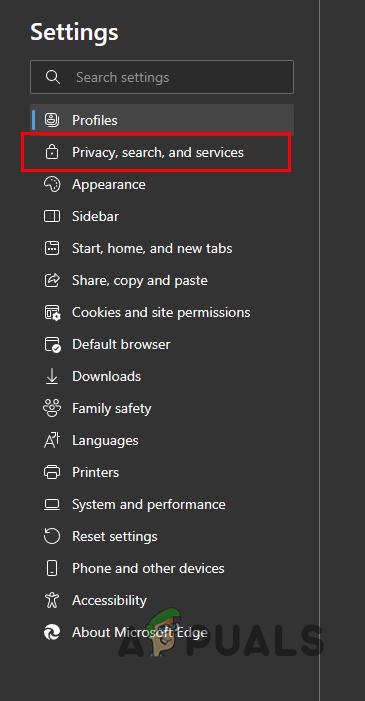
- From the drop-down menu, choose Settings.
- On the Settings page, navigate to the Privacy, search, and services tab.
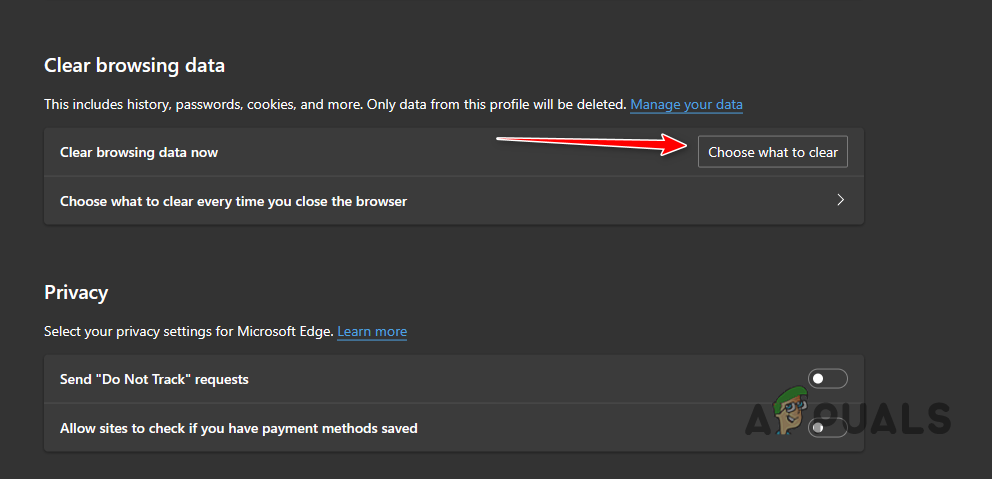
Navigating to the Privacy, Search and Services tab - After that, scroll down and click the Choose what to clear option next to Clear browsing data now.
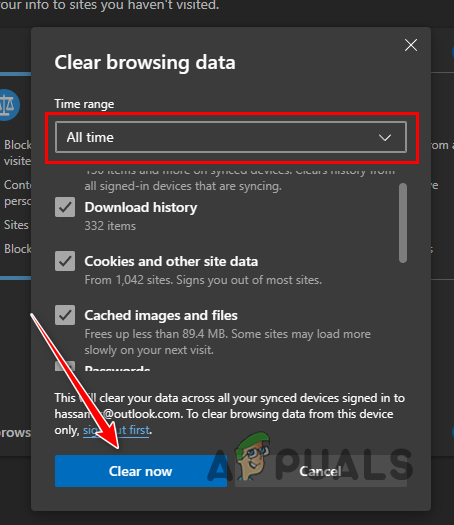
Clearing Browser Data - On the Clear browsing data dialog box, choose All time as the Time range.
- Select Cookies and other site data, Cached images and files and Site permissions checkboxes from the list.
- Finally, click the Clear now option.
Clearing Browser Cache on Microsoft Edge
Mozilla Firefox
- Click on the More menu in the top-right corner and choose Settings from the drop-down menu.
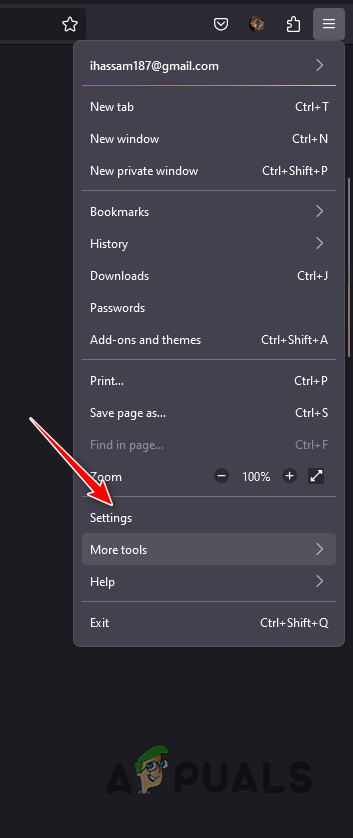
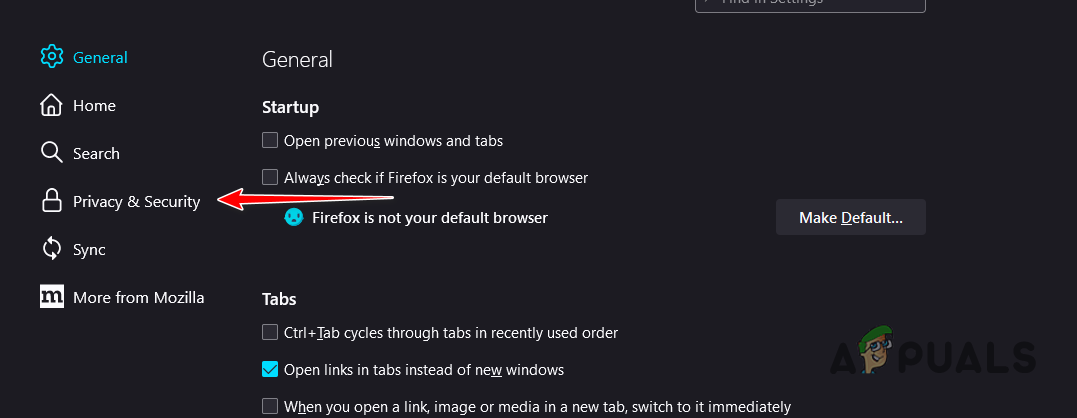
Navigating to Firefox Settings - On the Settings screen, click on the Privacy & Security option on the left-hand side.
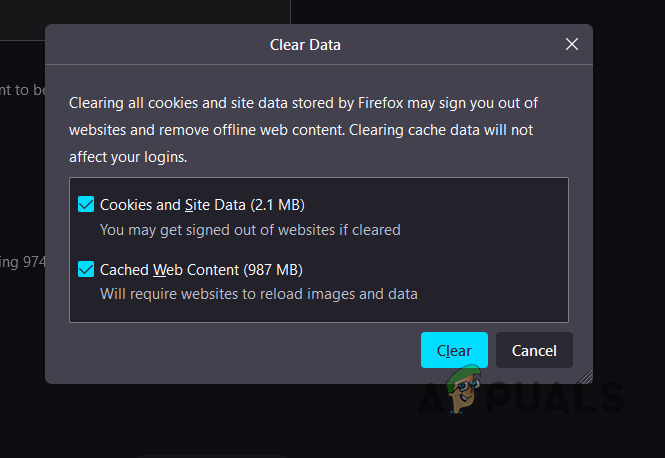
Navigating to the Privacy and Security tab - There, click on the Clear Data option.
- With both of the checkboxes selected on the Clear Data dialog box, click the Clear option.
Clearing Browser Cache on Firefox
4. Remove Third-Party VPN
Another potential cause can be the third-party VPN that you are using on your device. Using a VPN can have various benefits as it masks your online presence with the help of tunneling which improves your privacy. However, using a VPN service can come with its own issues when accessing certain platforms, such as PayPal. As most of these IP addresses are public, PayPal quickly manages to blacklist these IP addresses and therefore blocking your access.
If you are connected to a VPN client on your device, we recommend disconnecting the connection so that your actual IP address is revealed to the servers. This will allow you to access the platform and go about your business without any hassles. If you have added a VPN connection to your Windows PC, follow the instructions below to remove it:
- First, open the Settings app by pressing the Windows key + I on your keyboard.
- In the Settings app, navigate to Network and Internet > VPN.

Navigating to VPN Settings - There, click on the Disconnect option next to your VPN connection to disconnect from it.
- To remove the VPN connection, click on the down arrow icon.
- From the additional options, click the Remove button.
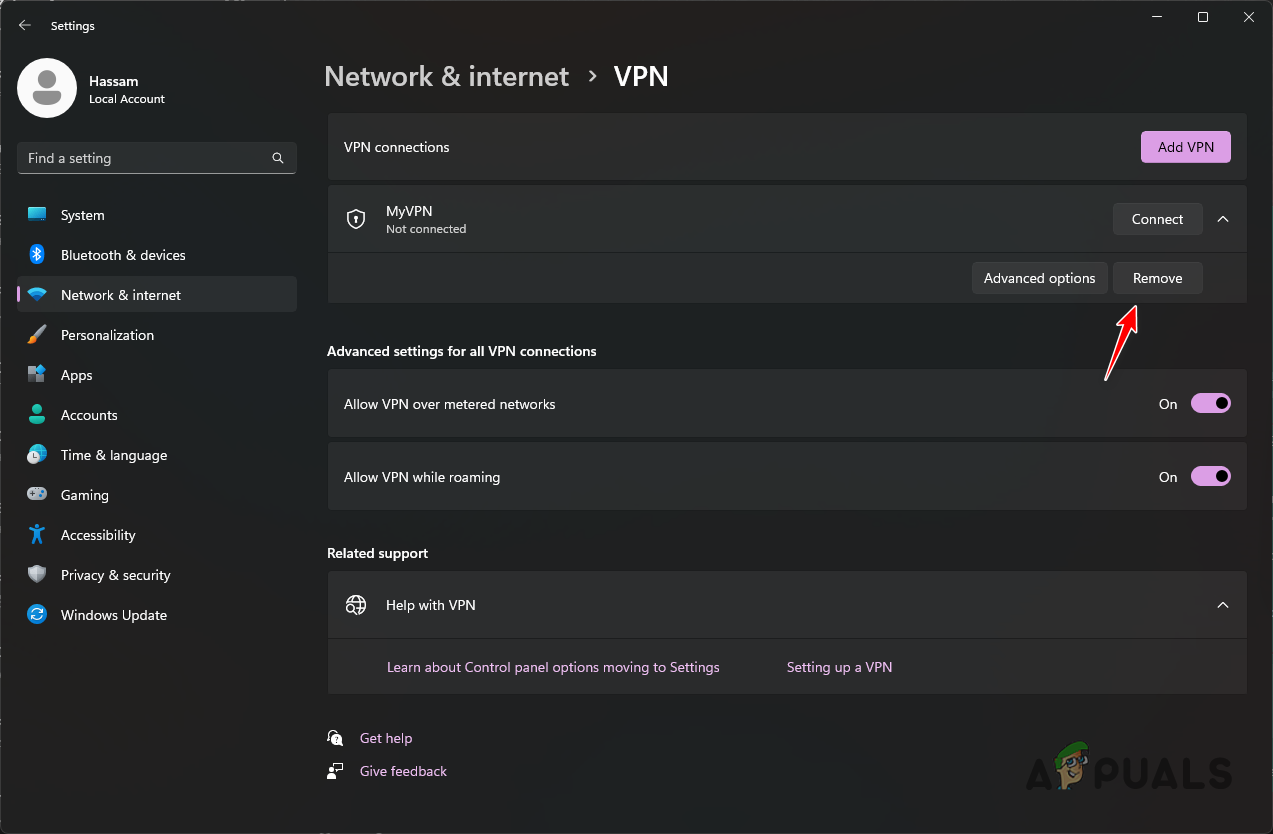
Removing VPN Connection
5. Contact your ISP
Finally, if none of the above methods has resolved the issue for you in question, it is likely the problem is caused by inconsistency on your network and the overall resolution of the request. In such a scenario, you will have to reach out to your internet service provider (ISP) for help in this regard.
This is because they will be able to use various tools on their end to trace the request and pinpoint the problem. This can take some time depending upon your ISP and it is not a quick solution to your problem, however, this is the only way, at this point, to reach a resolution.
Reviewed by Muhammad Zubyan